
From the 24 Hours of Daytona to His Own Garage: Racing Driver Romain Monti His Dream Porsche 996 Build
Professional racing driver Romain Monti has spent two decades driving some of the fastest cars on the planet. So when

New ! Lowering  links for vehicles that are equipped with factory Airmatic suspension systems.

Designed and manufactured, fully adjustable zinc plated ride height sensor arms, that push fit in place of the existing steel or plastic units each new kit, has been put through the same ’96 Hour Salt Test’ to ensure that they will not rust.
The ball joint ends, have been specifically manufactured for each vehicle and come complete with internal spring clips to guarantee a snug fit, together with a rubber grommet to keep the units free from any dirt. The links are fully adjustable, so that you can set the new height of your car to your exact preference.
The kits are extremely easy to install using basic tools, and take no longer than 1 hour to fit, and remember that the original links can be re-fitted to the vehicle or you can re-adjust the new links to put the car back into the standard height setting for warranty purposes or selling the car.
The links can be adjusted to set your car as low as you want. We suggest a maximum drop on all cars and this will be in all instructions enclosed. Installing these links is a fully reversible process and gets away from fitting an electronic module (Costing Around £1200.00), where you have to cut into the vehicles wiring loom hoping you do not damage anything.
All kits come with a complete detailed instruction briefing that even has photographs of where the links should be installed.
Fits: Porsche Cayenne with Air Suspension
How they work:
On the Porsche Cayenne there is a Ride Height Sensor on each of the four Control Arms. These sensors are connected to the frame of the vehicle by a short linkage called a Sensor Arm. The stock sensor arms or “links” are of fixed length and move with the suspension. They establish the position of the sensor which indicates to the computer what height the vehicle should be sitting at.
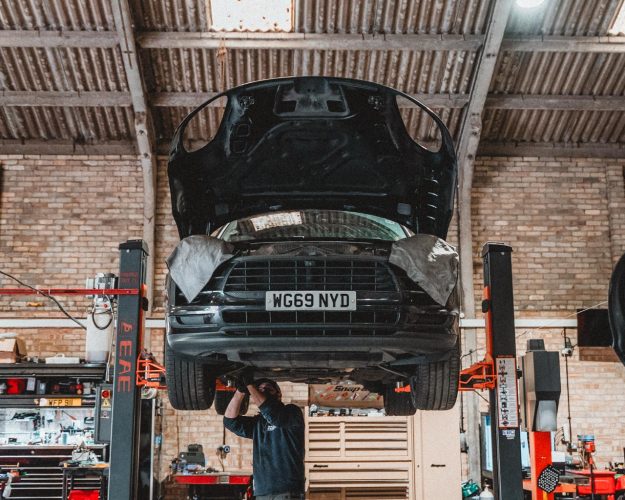
To see what these links look like on most vehicles is easy. Put the vehicle to the highest suspension setting and look straight into the wheel well on top of the front tire. You may need a flashlight. In the rear you have to look from underneath.
Our kit replaces the stock sensor arms with Fully Adjustable Aluminum Links. When extended, they change the voltage sent to the computer by the sensor. The computer then evaluates the ride height to be higher than the factory setting and compensates by lowering the vehicle.
Electronic Modules are really expensive and limit the height that your vehicle can be dropped. They often have to be hard wired which may lead to factory warranty issues. Worst of all, installation of a lowering module is extremely difficult to reverse. Setting the links to the original link length places your vehicle to the stock height. The standard/reverse thread design allows you to adjust the links on the vehicle for easy height modification.
FAQ:
Q. Will lowering my vehicle improve the handling?
A. Yes. A lower center of gravity always helps your vehicle’s handling.
Q. Will the raise button inside the vehicle still work?
A. Yes.
Q. Will I need an alignment?
A. Yes. Any time a vehicle is lowered the alignment should be checked.
Q. How will the links affect my warranty?
A. The kits have never caused any issue on any vehicle. If for some reason your vehicle’s air suspension failed while under warranty, we recommend installing the original links which takes no longer than 60 minutes to do.
Buy This Product Click Here
Installation Instructions
**Make sure the key is out of the ignition while installing your linkages. If you are just reaching in through the driver’s side window to remove the key make sure to open and close the door!**
Tools Required – 9mm & 10mm spanner and large flat ended screwdriver.
**Please remember to fit all four links at once. Do not install just the front or rears and try to start the vehicle. As this may trigger a fault code and will raise that end to the highest setting**
Adjust the new links so that all four are the same length but do not lock them off until you are satisfied with your new ride height. Adjust the long ball joint end only.
Every 5mm longer you make the linkage the vehicle will lower by approximately 1/2″-3/4â€. The linkages are already designed to be 5mm longer than the standard linkages so you will obtain a lower ride height from the outset.
Adjust the long ball joint only by a maximum of 15mm to give an approximate ball centre to centre of 90mm. You will be able to extend the linkages to obtain a 2.5†– 3†drop.
Front:
1. Jack the vehicle up to raise the front end or raise the vehicle to the highest setting and locate the sensor as per the pictures below.
****For safety purposes place axle stands under the end of the vehicle you are working on****
2. Remove the original ride height control arm by prizing it off with a 9mm spanner or a screwdriver at the top of the arm closest to the bracket. Twist it gently so that it pops off the ball. Once one end of the standard linkage is off the other comes of easily by simply bending it backwards. (**BE GENTLE, DO NOT DAMAGE THE SENSOR!**)
3. Fit a Rubber Grommet to each ball to ensure the ball and ball joint are protected from the elements.
4. Install the adjusted Linkages with the long ball joint end at the top by firmly pushing the joint onto the ball.
 Â Â
      Â
   Â
Rear:
1. Jack the vehicle up to raise the rear end or raise the vehicle to the highest setting and locate the sensor as per the pictures below. The sensors are behind each wheel and are visible from underneath the vehicle.
****For safety purposes place axle stands under the end of the vehicle you are working on****
2. Remove the original ride height control arm by prizing it off with a 9mm spanner or a screwdriver at the top of the arm closest to the bracket. Twist it gently so that it pops off the ball. Once one end of the standard linkage is off the other comes of easily by simply bending it backwards. (**BE GENTLE, DO NOT DAMAGE THE SENSOR!**)
3. Fit a Rubber Grommet to each ball on the car to prevent dirt wearing the ball and joint.
4. Install the pre-adjusted Linkages with the long ball joint end at the bottom by firmly pushing the joint onto the ball.
  Â
 
 “Remember – Longer is lowerâ€
Initializing the adjusted suspension:
Start the vehicle whilst on a level surface and select the lowest suspension setting (Access mode or similar) and move the vehicle back and forth to assist the cars computer to settle to the new adjustments and compression to build in the air system.
 It may take a couple attempts to get the exact height of your liking.
Once you are at a height of your liking you may then raise the vehicle and lock up all of the linkages.
To return the car back to standard simply repeat the steps using the original linkages. As the standard joints harden with age you may find them hard to put them back on. If this is the case apply some lubricant (WD40 or similar silicon based product) to the ends and squeeze on with pliers.
Professional racing driver Romain Monti has spent two decades driving some of the fastest cars on the planet. So when

Wheels & Watches returned to Tewinbury Farm on 19 July 2026, bringing together an impressive mix of Porsche models, special

m. mBest exhaust for 997 Carrera owners depends on far more than which system is the loudest. The right choice
Porsche Macan service work was recently carried out at William Francis, where the specialist team gave this Macan the attention