





Enter your VAT number here and click Verify:
Your details have been verified. VAT number registered to:
,
.
Your order will now be zero rated for VAT purposes. We reserve the right to verify these details after your order request has been made and reinstate VAT if required.
Your VAT details were not recognised or were invalid. Your VAT number must be matched to your Billing Country as specified above. This is currently specified as . You do not need to enter the country code part of your VAT number as this has already been selected in your billing address details above.
The VAT number checking service is currently offline. Please supply your VAT details within the comments or special instructions field below and we will apply a VAT discount after placing your order request.

Your Porsche
Porsche

Porsche for Porsche
Porsche genuine parts and lifestyle products for Porsche models from Design911
A Quick Look at Porsche
Porsche information on this page is based on details supplied by the manufacturer or distributor, plus any OE references provided with the parts.
Choosing the Right Fit for Your Porsche
Where Porsche is listed for Porsche, use the supplied model coverage and OE references to confirm suitability. Check details that commonly affect fitment such as model year, side/position, and connector type where relevant.
- Typical reasons people replace these parts include maintaining originality, keeping factory specification, and choosing the latest genuine revisions for peace of mind.
- Common real-world issues behind many Porsche repairs are age and mileage: oil leaks, cooling system fatigue, brake and suspension wear, corrosion and electrical faults from moisture or heat cycling.
- Before ordering, confirm part numbers against VIN or option/PR codes, especially for safety‑critical or complex components.
- When upgrading, decide whether you want pure originality or performance changes, as some aftermarket options may suit specific goals better than genuine.
- For bigger jobs, replace related seals, hardware and consumables at the same time to avoid repeat labour and compatibility issues.
- Where available, follow the manufacturer’s fitting and bedding‑in guidance to get the best performance and longevity.
Browse by Category
If you already know the area you are working on, start with the category and then filter by Porsche model. Where real-world symptoms and typical reasons to replace are provided, use them to keep the wording grounded.
Brakes — Brake components are renewed to restore stopping performance, address wear or upgrade a Porsche for fast road or track use. Common symptoms include: Common symptoms include vibration under braking, increased stopping distances, squealing, pulling to one side, warning lights and visible wear to discs and pads.
- Check whether the parts are OE-equivalent replacements or performance upgrades and match this to how the Porsche is used.
- Follow any recommended bedding-in procedure and consider replacing discs, pads, sensors and fitting hardware together where advised.
Clothing & Gifts — Porsche-themed clothing and gifts let owners and enthusiasts show their passion off the road, or make ideal presents for fans of the marque. Common symptoms include: Items may become worn, faded, damaged or go out of style, prompting replacement with newer designs.
- Review available size, colour and material details to help choose the right item and ensure it matches how it will be used.
- Check any care or washing guidance so garments and accessories keep their appearance for longer.
Lifestyle — To explore different Porsche-inspired lifestyle products or gift ideas. Common symptoms include: General wear from handling or display.
- Confirm whether items are official Porsche lifestyle products or from trusted partner brands where stated.
- Consider who the item is for and how it will be used day to day to select the most suitable style or product type.
Keyring — To choose a different design, material or model theme. Common symptoms include: Scratches, worn finishes or loose fittings.
- Keyrings make simple, practical Porsche-themed gifts and can be matched to specific models or heritage designs where available.
- If a keyring shows damage or looseness, replace it to avoid losing keys or further wear to finishes.
Size chart — The size chart acts as a practical reference tool for all apparel purchases. Common symptoms include:
Explore Porsche at Design911
View the current Porsche range for Porsche at Design911, then filter by model and category to narrow down to the right parts.


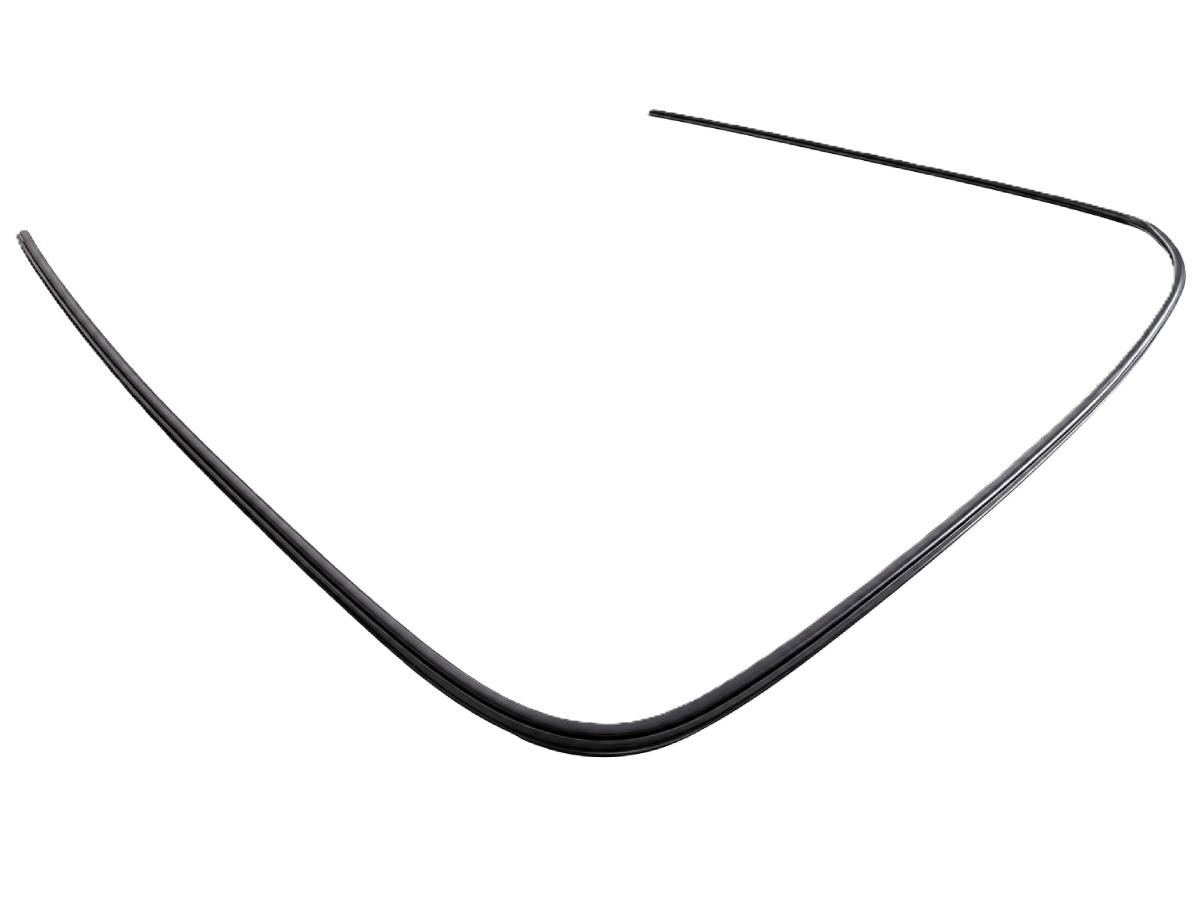
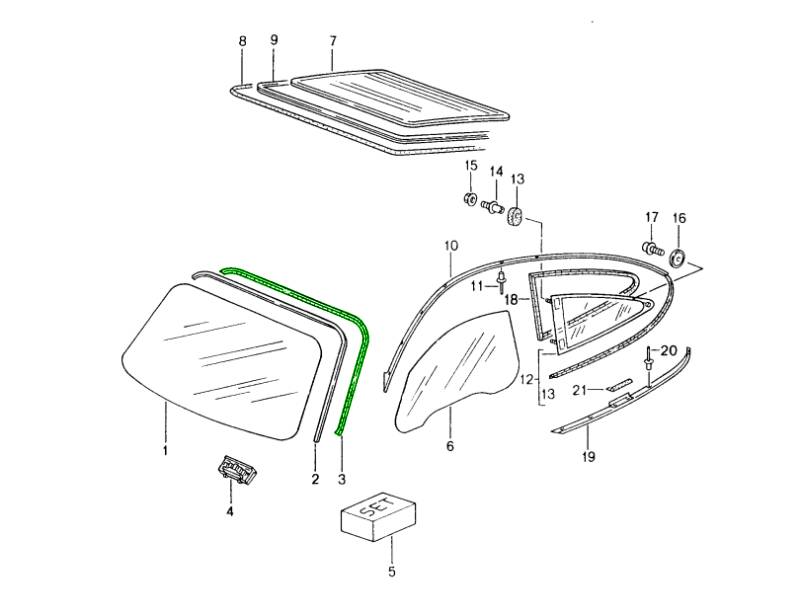
The Genuine Porsche Windscreen Decorative Trim Frame 99654154101 is the exterior finishing trim fitted around the perimeter of the front windscreen on selected early Porsche 911 (996) models.
Fits:
- Porsche 996 C2 3.4L 1997-08/01
- Porsche 996 C4 3.4L 1997-08/01
- Porsche 996 C2 3.6L 09/01-2001
- Porsche 996 C4 3.6L 09/01-2001
- Porsche 996 C4S 3.6L 09/01-2001
- Porsche 996 TURBO 2000-01
- Porsche 996 GT2 2001
- Porsche 996 GT3 MKI 1999-01
Diagram Ref No 3
Designed to follow the shape of the windscreen aperture, the trim provides the clean factory-finished transition between the glass and surrounding bodywork.
It is a separate component from the windscreen sealing frame and from the structural adhesive that bonds the windscreen to the vehicle.
The decorative frame helps conceal the edge of the windscreen installation, protects the perimeter area from direct dirt and debris and maintains the neat appearance intended by Porsche.
With age, the original trim can become brittle, faded, cracked, distorted or loose due to constant exposure to sunlight, rain, temperature changes and vehicle washing.
Replacing deteriorated trim restores the correct appearance around the windscreen and prevents loose or damaged sections from lifting away from the glass.
What This Product Does:
The Windscreen Decorative Trim Frame forms the visible finishing surround around the front windscreen.
Its main functions are to:
- Provide a neat factory finish around the windscreen.
- Cover the visible perimeter between the glass and surrounding bodywork.
- Protect the edge area from direct dirt and debris.
- Help keep the windscreen perimeter visually tidy.
- Follow the correct factory windscreen profile.
- Replace cracked, faded, distorted or missing original trim.
- Restore the original appearance of the front glazing installation.
Symptoms Of Wear Or Failure:
Common signs of deterioration include:
- Cracked trim.
- Brittle material.
- Sections breaking away.
- Trim lifting from the windscreen edge.
- Loose corners.
- Shrinkage.
- Warping.
- Distortion.
- Faded or weathered finish.
- Gaps around the windscreen perimeter.
- Trim no longer sitting flush.
- Increased wind noise near the windscreen edge.
- Missing sections.
- Damage following windscreen replacement.
Why Replacement Matters:
Replacing a deteriorated Windscreen Decorative Trim Frame helps restore:
- Correct windscreen perimeter appearance.
- Factory-style exterior finish.
- Proper trim alignment.
- Reduced loose or lifted sections.
- Protection of the visible windscreen edge.
- Consistent fit following glass replacement.
Related reference numbers
Related, superseded, cross reference or alternative numbers for comparison.
99654154101
The product you are viewing cross references to these numbers
- Porsche 996 C2 3.4L 1997-08/01
- Porsche 996 C4 3.4L 1997-08/01
- Porsche 996 C2 3.6L 09/01-2005
- Porsche 996 C4 3.6L 09/01-2005
- Porsche 996 C4S 3.6L 09/01-2005
- Porsche 996 TURBO 2000-05
- Porsche 996 GT2 2001-05
- Porsche 996 GT3 MKI 1999-02
 Shop Securely
 12 Month Warranty
 Worldwide Delivery

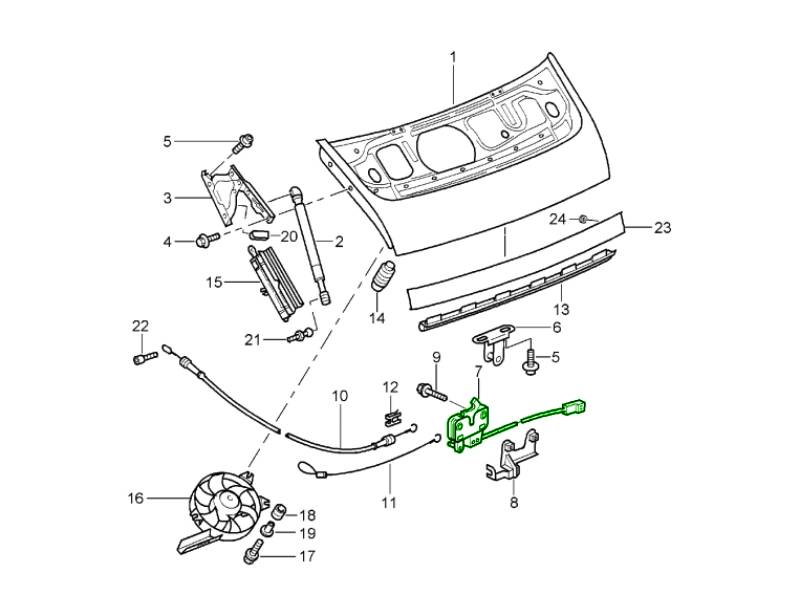
Rear Engine Lid Lower Latch.
The Genuine Porsche Rear Engine Lid Lower Latch is a replacement locking component for the rear engine lid of selected Porsche 911 (996) models.
Fits:
Diagram Ref No 7
Mounted in the lower section of the rear lid locking system, the latch engages with the upper lock component when the engine lid is closed. It holds the lid securely in position while allowing it to be released through the vehicle's normal engine-lid opening mechanism.
A correctly functioning latch is important for keeping the engine lid firmly closed, correctly aligned and free from unwanted movement while driving. Age, corrosion, repeated operation or mechanical damage can cause the latch mechanism to become stiff, worn or unreliable.
What This Product Does:
- Secures the rear engine lid in the closed position.
- Engages with the upper engine lid locking component.
- Prevents the engine lid from lifting or moving while driving.
- Allows the lid to release when the opening mechanism is operated.
- Helps maintain correct engine lid alignment.
- Reduces rattles or movement from a poorly retained rear lid.
- Works with the release cable or actuator and associated locking hardware.
- Provides a secure mechanical connection between the lid and vehicle body.
- Replaces a worn, corroded, sticking or damaged original latch.
Porsche parts diagrams identify 99651205303 specifically as the lower part of the rear lid lock, working together with upper lock 99651221300 and the associated release components.
Symptoms Of Wear Or Failure:
Possible symptoms include:
- Engine lid difficult to close.
- Lid requiring excessive force to latch.
- Engine lid failing to remain securely closed.
- Lid popping open after being shut.
- Engine lid not releasing when the release switch or cable is operated.
- Latch mechanism sticking.
- Release mechanism feeling unusually stiff.
- Excessive play in the closed engine lid.
- Rattling from the rear lid while driving.
- Uneven engine lid alignment.
- Visible corrosion on the latch mechanism.
- Bent or damaged latch components.
- Excessive wear around the locking surfaces.
- Latch failing to return smoothly after release.
- Problems developing after accident damage or rear body repair.
Some of these symptoms may also be caused by incorrect lid adjustment, a stretched or damaged release cable, actuator problems or a misaligned upper lock, so the complete mechanism should be inspected before replacement.
Why Replacement Matters:
The rear engine lid must remain securely closed whenever the vehicle is being driven.
A worn or damaged latch can make the lid difficult to close securely or difficult to open when access to the engine compartment is required.
Replacing a defective latch helps restore:
- Reliable engine lid locking.
- Smooth release operation.
- Correct lid alignment.
- Reduced movement and rattling.
- Secure retention while driving.
- Proper operation of the engine-lid release system.
- Factory-style operation and fit.
A reliable latch is particularly important because the engine lid is repeatedly opened for servicing, fluid checks and maintenance throughout the vehicle's life.
Related reference numbers
Related, superseded, cross reference or alternative numbers for comparison.
99651205303
The product you are viewing cross references to these numbers
- Porsche 996 C2 3.4L 1997-08/01
- Porsche 996 C4 3.4L 1997-08/01
- Porsche 996 C2 3.6L 09/01-2005
- Porsche 996 C4 3.6L 09/01-2005
- Porsche 996 C4S 3.6L 09/01-2005
- Porsche 996 TURBO 2000-05
- Porsche 996 GT2 2001-05
- Porsche 996 GT3 MKI 1999-02
- Porsche 996 GT3 MKII 2003>>
Shop Securely
12 Month Warranty
Worldwide Delivery

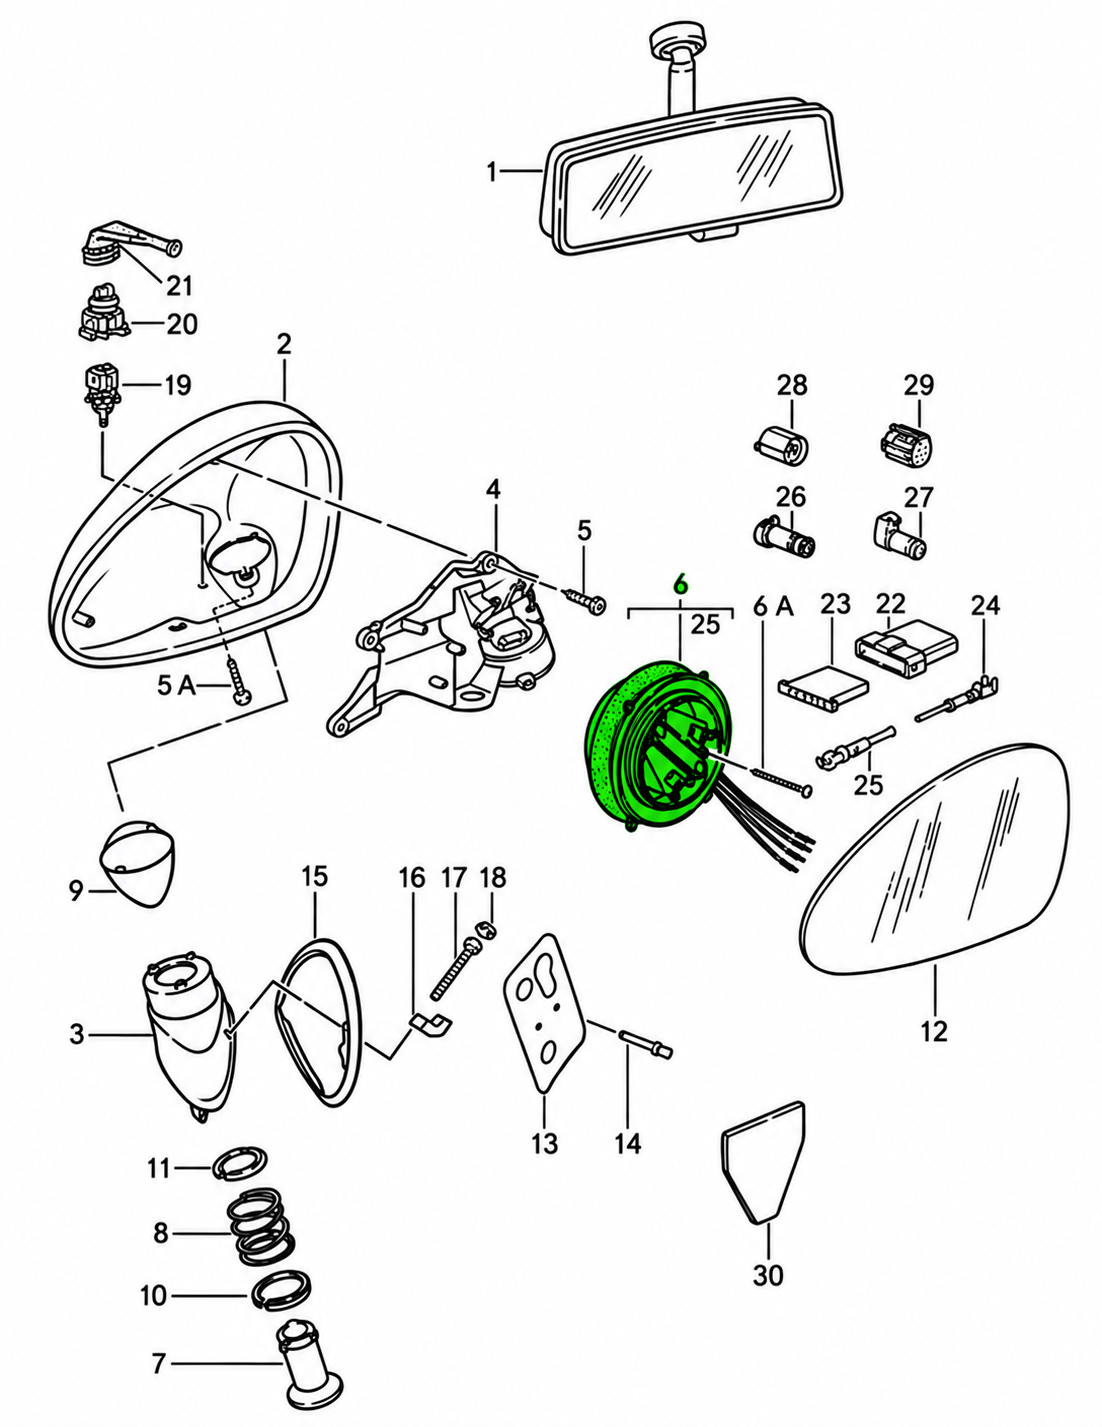
Exterior mirror adjuster unit. Electrically operated mechanism that controls the position of the exterior mirror glass.
Fits
- Porsche 964 (911) Turbo >>1991
Check fitment for your specific vehicle (model, year, engine) before ordering.
What This Product Does
The adjuster unit sits within the exterior mirror assembly and moves the mirror glass in response to the interior adjustment control. Correct operation allows the driver to set the mirror angle for suitable rearward and side visibility.
Functions
- Provides electrical adjustment of the exterior mirror glass
- Moves the glass through its horizontal and vertical adjustment
- Maintains the selected viewing angle when the mechanism is functioning correctly
Technical Details
- Genuine Porsche component
- Porsche part number: 96562404902
- Component type: exterior mirror adjusting motor/unit
- Installation position: within the exterior mirror assembly
- Exact-number catalogue information identifies the unit for left or right mirror use
Symptoms of Fault
- Mirror glass does not move when the control is operated
- Adjustment works intermittently or in only one direction
- Unusual clicking or buzzing is heard from the mirror housing
- The mirror cannot be positioned accurately using the electrical control
Why Replacement Matters
A failed adjuster can prevent the exterior mirror from being set to the required angle. Replacing the defective unit restores normal electrical adjustment while retaining the existing mirror housing and related components where these remain serviceable. Confirm the part number against the vehicle details, as mirror mechanisms and connections can vary by production period.
FAQs
- Is this the complete exterior mirror?
No. This is the internal adjuster unit used to position the mirror glass. - Can it be used on either side?
Exact-part-number catalogue information identifies this adjuster as suitable for left or right mirror use. Vehicle compatibility should still be confirmed before installation. - How should suitability be checked?
Compare part number 96562404902 with the existing component and confirm the application using the vehicle identification details.
Related reference numbers
Related, superseded, cross reference or alternative numbers for comparison.
96562404902
The product you are viewing cross references to these numbers
- Porsche 964 (911) TURBO 3.3L 1991-93
- Porsche 964 (911) TURBO 3.6L 1991-93
Shop Securely
12 Month Warranty
Worldwide Delivery

Fits:
- Porsche 964 (911) C2 1989-93
- Porsche 964 (911) C4 1989-93
- Porsche 964 (911) RS 3.6L 1991-93
- Porsche 964 (911) RS 3.8L 1991-93
- Porsche 964 (911) TURBO 3.3L 1991-93
- Porsche 964 (911) TURBO 3.6L 1991-93
- Porsche 993 (911) C2 1994-97
- Porsche 993 (911) C4 1994-97
- Porsche 993 (911) RS 1994-97
- Porsche 993 (911) C2S 1994-97
- Porsche 993 (911) C4S 1994-97
- Porsche 993 (911) TURBO 1994-96
- Porsche 993 (911) GT2 1994-97
- Porsche 993 (911) TURBO S 1994-97
Diagram Ref No 15
The lever forms part of the mechanical linkage that raises and lowers the movable rear spoiler. It connects with the spoiler linkage and associated mounting hardware, transferring movement through the mechanism so the spoiler can extend and retract correctly.
What This Product Does:
The rear spoiler system uses a combination of drive components, linkage, levers, pivots and mounting hardware to move the spoiler between its lowered and raised positions.
The spoiler lever helps:
- Transfer movement through the spoiler mechanism
- Support the left side of the movable spoiler
- Maintain correct spoiler positioning
- Keep both sides of the spoiler moving together
- Guide the spoiler through its operating arc
- Maintain correct alignment when raised or lowered
- Connect the spoiler assembly with the main linkage system
Although relatively small, the lever is important to the geometry of the complete retractable spoiler mechanism.
Symptoms Of Wear Or Failure:
Possible symptoms of a worn, bent or damaged rear spoiler lever include:
- Spoiler raising unevenly
- One side sitting higher than the other
- Spoiler failing to reach its full raised position
- Spoiler failing to retract completely
- Jerky spoiler movement
- Binding during operation
- Clicking or knocking noises
- Excessive free play in the mechanism
- Spoiler appearing twisted when raised
- Visible bending or distortion of the lever
- Cracked or damaged pivot areas
- Excessive wear around mounting holes
- Spoiler warning indication caused by incomplete movement
- Increased load or strain on the spoiler drive system
Any unusual spoiler movement should be investigated before repeated operation causes additional damage.
Why Replacement Matters:
A damaged spoiler lever can affect the entire retractable spoiler mechanism.
Continued operation may result in:
- Increased load on the spoiler motor
- Damage to the linkage
- Wear of pivot points
- Damage to mounting plates
- Spoiler misalignment
- Incomplete spoiler deployment
- Spoiler jamming
- Damage to adjoining bodywork or trim
Replacing the damaged lever restores the correct mechanical relationship between the spoiler and linkage.
Related reference numbers
Related, superseded, cross reference or alternative numbers for comparison.
9645120
The product you are viewing cross references to these numbers
- Porsche 964 (911) C2 1989-93
- Porsche 964 (911) C4 1989-93
- Porsche 964 (911) RS 3.6L 1991-93
- Porsche 964 (911) RS 3.8L 1991-93
- Porsche 964 (911) TURBO 3.3L 1991-93
- Porsche 964 (911) TURBO 3.6L 1991-93
- Porsche 993 (911) C2 1994-97
- Porsche 993 (911) C4 1994-97
- Porsche 993 (911) RS 1994-97
- Porsche 993 (911) C2S 1994-97
- Porsche 993 (911) C4S 1994-97
- Porsche 993 (911) TURBO 1994-96
- Porsche 993 (911) GT2 1994-97
- Porsche 993 (911) TURBO S 1994-97
Shop Securely
12 Month Warranty
Worldwide Delivery

Fits:
- Porsche 996 C4S 3.6L 09/01-2005
- Porsche 996 TURBO 2000-05
- Porsche 996 GT2 2001-05
Diagram Ref No 2
Supplied in a prime-coated GRV finish, the panel is intended for professional body repair and restoration before being prepared and painted to match the vehicle.
What This Product Does:
The door sill forms part of the lower side structure of the vehicle beneath the door opening.
Its functions include:
- Forming the lower outer section of the door aperture
- Providing the correct body contour along the side of the car
- Supporting accurate alignment with adjoining body panels
- Protecting internal sill structure from direct exposure
- Providing a finished exterior surface below the door
- Maintaining the correct wide-body profile
- Providing a sound replacement section during accident or corrosion repair
Correct sill geometry is important because the panel interfaces with the door opening, rear quarter area and adjoining side structure.
Symptoms Of Wear Or Failure:
A body sill does not wear in the same way as a mechanical component, but it can deteriorate through corrosion or physical damage.
Common signs that replacement may be required include:
- Visible rust
- Bubbling paint
- Perforation
- Deep corrosion
- Accident damage
- Crushed sill sections
- Incorrect jacking damage
- Large dents
- Creasing
- Split seams
- Distorted door aperture
- Poor panel alignment
- Previous poor-quality repairs
- Cracking filler
- Water entering the sill area
- Damaged mounting or joining edges
Minor cosmetic dents may sometimes be repairable without replacing the complete panel, but extensive damage can justify replacement.
Why Replacement Matters:
A badly damaged or corroded sill can compromise:
- Body-panel alignment
- Weather sealing around the door
- Exterior appearance
- Corrosion protection
- Correct fit of adjoining panels
- Quality of structural body repairs
Replacing a damaged outer sill allows the body repairer to restore the correct factory profile and provide fresh corrosion protection.
Where damage extends beyond the outer panel, the underlying sill structure must also be inspected and repaired.
Related reference numbers
Related, superseded, cross reference or alternative numbers for comparison.
99650396
The product you are viewing cross references to these numbers
- Porsche 996 C4S 3.6L 09/01-2005
- Porsche 996 TURBO 2000-05
- Porsche 996 GT2 2001-05
Shop Securely
12 Month Warranty
Worldwide Delivery

The Genuine Porsche Front Bumper Retaining Strip is a replacement mounting component for the front bumper assembly of Porsche 911 (964) models from 1989–1994.
Fits:
- Porsche 964 (911) C2 1989-93
- Porsche 964 (911) C4 1989-93
- Porsche 964 (911) RS 3.6L 1991-93
- Porsche 964 (911) RS 3.8L 1991-93
- Porsche 964 (911) TURBO 3.3L 1991-93
- Porsche 964 (911) TURBO 3.6L 1991-93
Diagram Ref No 31
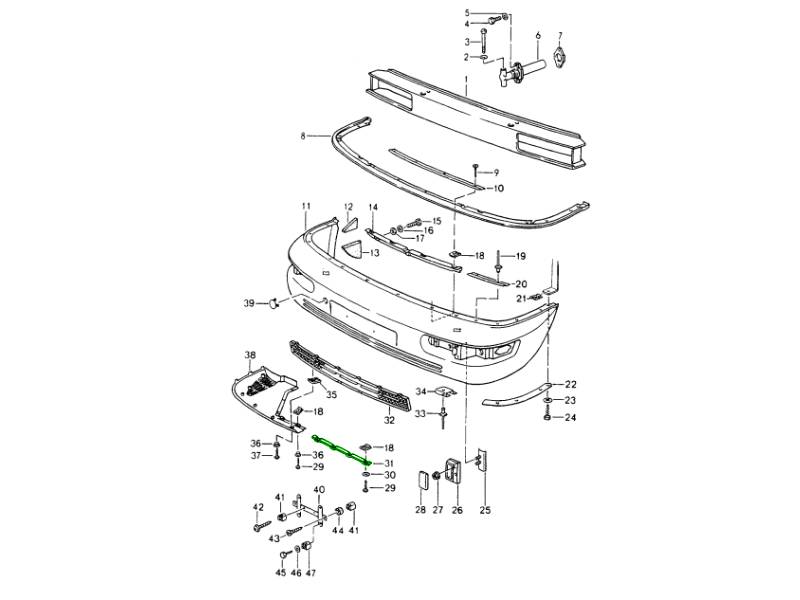
Located within the lower front bumper area, the retaining strip works with the front ventilation grille and associated fastening hardware to keep the grille and surrounding bumper components correctly secured and positioned.
Although relatively small, the retaining strip plays an important role in maintaining correct fit and alignment of the front bumper assembly. Age, impact damage, corrosion or previous removal can leave the original strip bent, weakened or unable to hold the associated components securely.
What This Product Does:
- Helps secure the front ventilation grille within the bumper assembly.
- Supports correct positioning of associated front bumper components.
- Provides a secure attachment point for the relevant fastening hardware.
- Helps maintain correct alignment of the lower front bumper area.
- Reduces unwanted movement of the ventilation grille.
- Helps prevent rattles caused by loose bumper components.
- Supports a clean, factory-correct bumper fit and appearance.
- Replaces a bent, damaged, corroded or missing original retaining strip.
- Provides the correct Genuine Porsche replacement during bumper restoration or repair.
The Porsche front bumper parts diagram places 96450515300 directly alongside the ventilation grille 96450514100 and its retaining rivets, confirming its role within the grille mounting assembly.
Symptoms Of Wear Or Failure:
Unlike a suspension or engine component, the retaining strip does not normally wear through movement. Problems are generally caused by age, corrosion, impact damage or repeated bumper disassembly.
Possible signs include:
- Front ventilation grille becoming loose.
- Rattling or vibration from the front bumper area.
- Grille moving when lightly pressed.
- Uneven positioning of the grille.
- Incorrect gaps around the lower bumper components.
- Broken or missing attachment points.
- Bent or distorted retaining strip.
- Corrosion or deterioration of the strip.
- Damaged rivet or fastener mounting points.
- Bumper components failing to sit flush.
- Previous repairs that no longer hold the grille securely.
- Missing retaining strip discovered during bumper restoration.
Why Replacement Matters:
The retaining strip helps keep the ventilation grille and associated bumper components firmly located in their intended position.
If the strip is damaged, distorted or missing, the grille may no longer be supported correctly. This can result in unwanted movement, rattles and poor alignment of the front bumper assembly.
Replacing a damaged retaining strip helps:
- Restore secure ventilation grille mounting.
- Maintain correct bumper alignment.
- Reduce unwanted movement and rattles.
- Restore factory-style panel fit.
- Provide reliable mounting for the associated fasteners.
- Improve the appearance of the front bumper.
- Prevent loose trim from deteriorating further.
- Complete a correct Porsche 964 bumper restoration.
Related reference numbers
Related, superseded, cross reference or alternative numbers for comparison.
96450515300
The product you are viewing cross references to these numbers
- Porsche 964 (911) C2 1989-93
- Porsche 964 (911) C4 1989-93
- Porsche 964 (911) RS 3.6L 1991-93
- Porsche 964 (911) RS 3.8L 1991-93
- Porsche 964 (911) TURBO 3.3L 1991-93
- Porsche 964 (911) TURBO 3.6L 1991-93
Shop Securely
12 Month Warranty
Worldwide Delivery

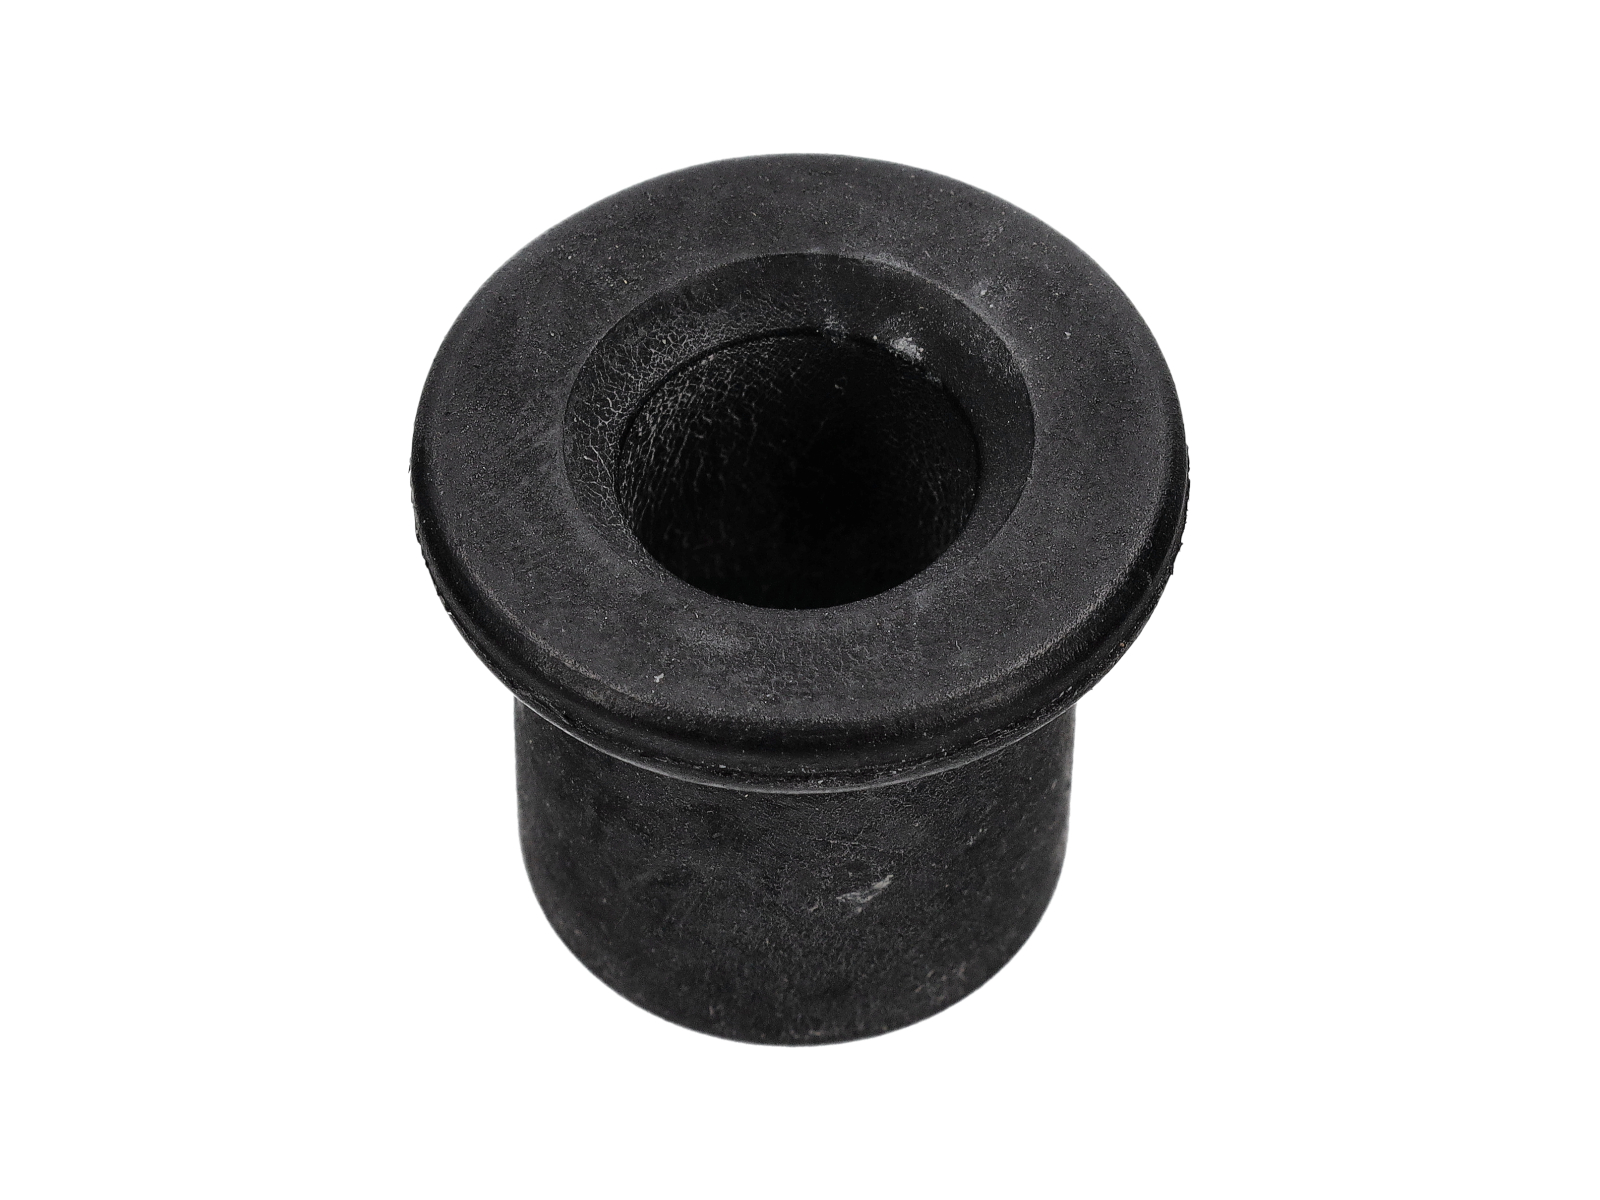
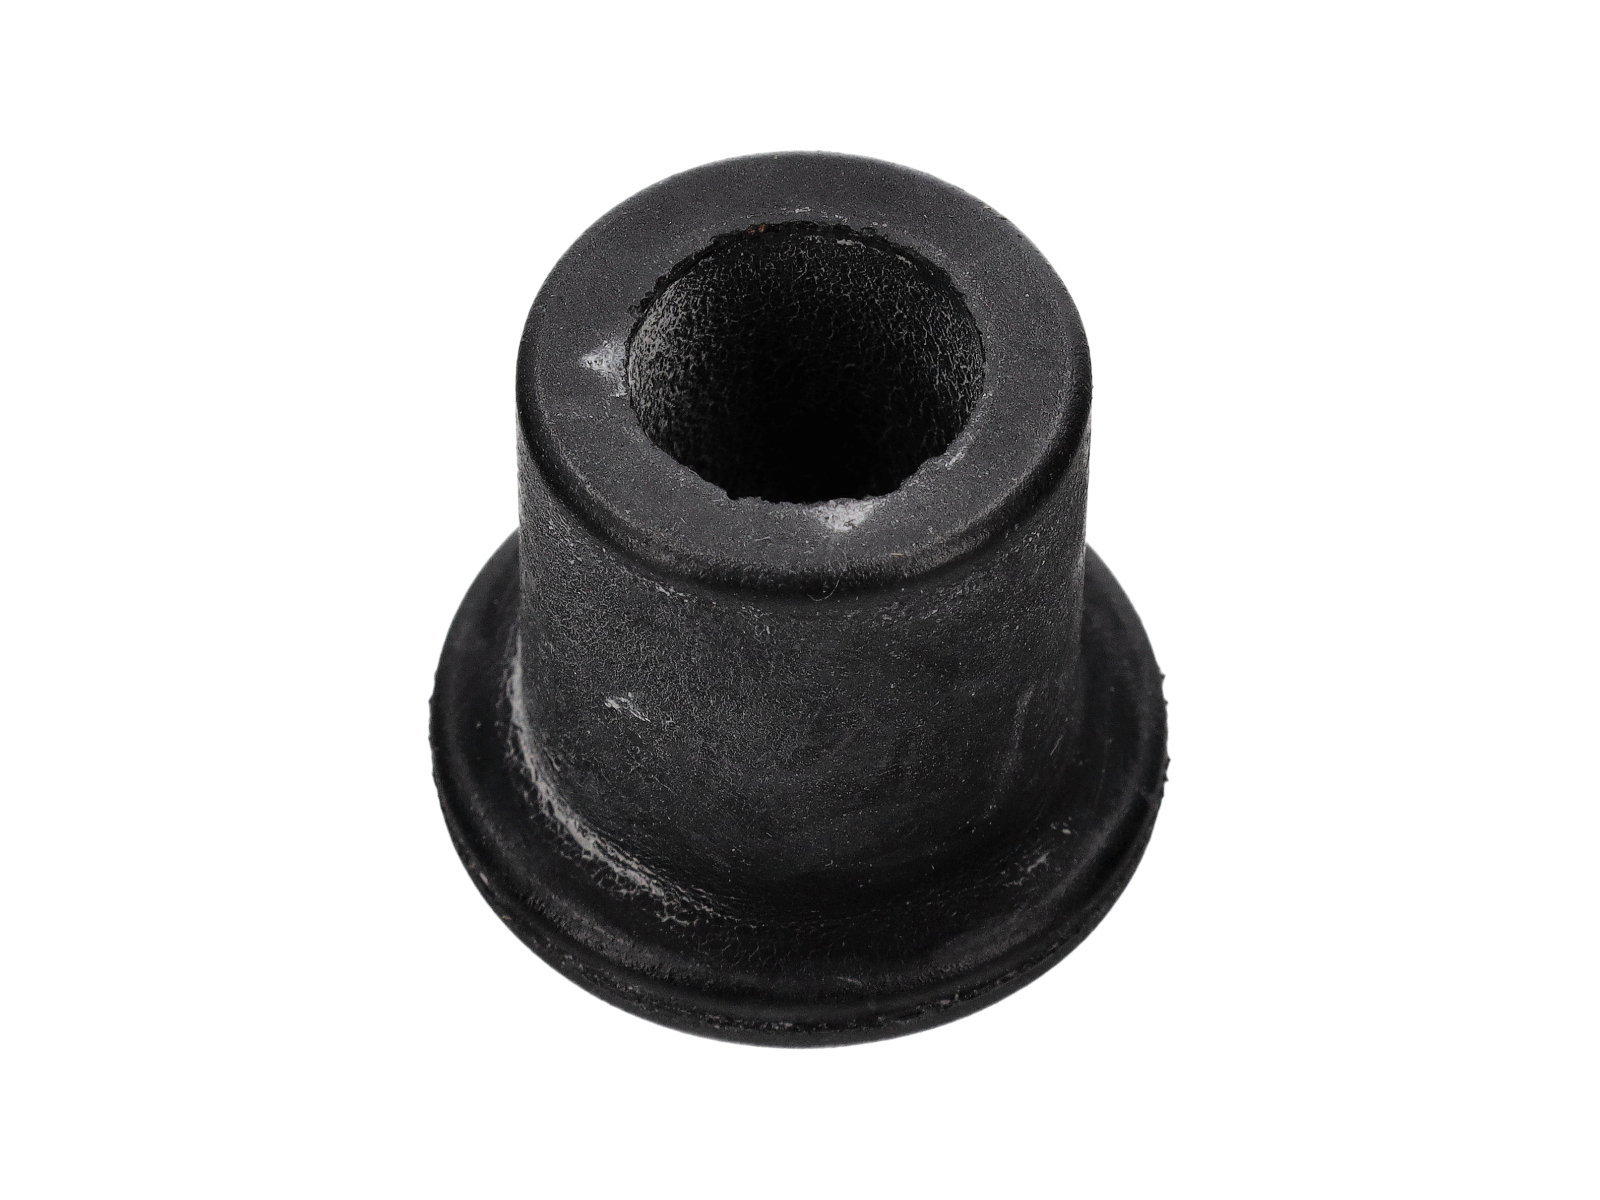
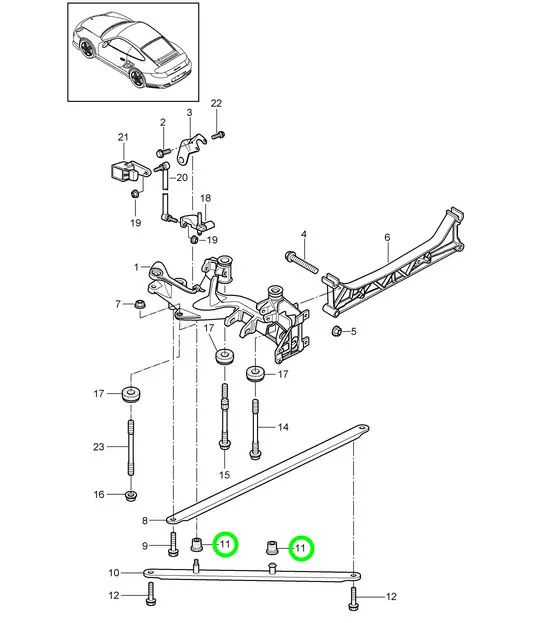
This genuine Porsche rear axle rubber isolator bush is used within the side-section, bracket and carrier assemblies of selected 996 and 997 911 models.
Fits
- Porsche 996 Carrera 2 / Carrera 4 3.4L 1997–08/01
- Porsche 996 Carrera 2 / Carrera 4 / Carrera 4S 3.6L 09/01–2005
- Porsche 996 Turbo 2000–05
- Porsche 996 GT2 2001–05
- Porsche 996 GT3 MKI 1999–02 / GT3 MKII 2003>> / GT3 RS 2003–04
- Porsche 997.1 Carrera 2 / Carrera 4 3.6L 2005–08
- Porsche 997.1 Carrera 2S / Carrera 4S 3.8L 2005–08
- Porsche 997.1 Turbo / GT2 / GT3 / GT3 RS 2007–09
- Porsche 997.2 Carrera 2 / Carrera 4 3.6L 2009–12
- Porsche 997.2 Carrera 2S / Carrera 4S 3.8L 2009–12
- Porsche 997.2 GT3 / GT3 RS 2010–11
- Porsche 997.2 Turbo 2010–13 / GT2 RS 2011–13
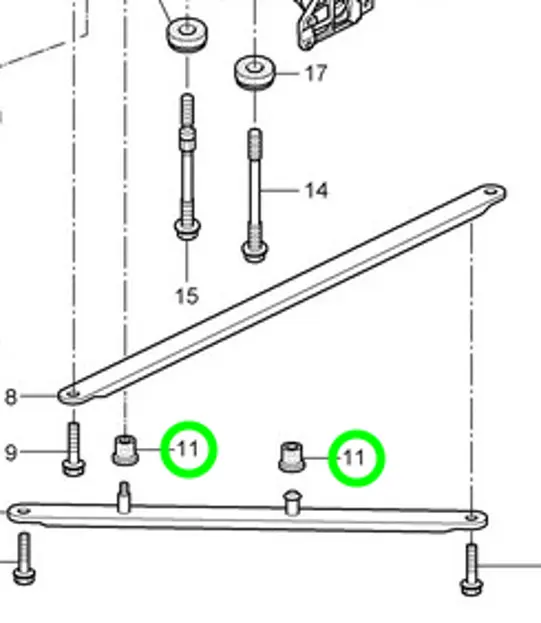
Diagram: Ref no 11
What This Product Does
The isolator forms a compliant interface at its designated rear axle mounting location. Its rubber construction cushions adjoining assembly parts, accommodates minor movement and reduces the direct transfer of vibration through the side-section or carrier connection.
Functions
- Separates associated components at the specified mounting point
- Cushions minor movement within the rear axle assembly
- Limits vibration passing through the mounting interface
- Supports the intended location of the side-section or carrier components
Technical Details
- Manufacturer: Porsche
- Part number: 99633138500
- Porsche catalogue description: rubber mounting
- Alternative diagram description: rubber bush or rubber isolator
- Installation area: rear axle side section, side part, bracket or carrier
- Diagram quantity: six per applicable assembly
Symptoms of Fault
- Rubber showing splits, compression, hardening or distortion
- Knocking or movement around the rear axle mounting area
- More vibration entering the body structure
- Looseness between associated carrier or side-section components
- Rear suspension behaviour that changes as the mounting moves under load
Why Replacement Matters
Deteriorated rubber may cease to isolate the connection or hold adjoining parts in their intended relationship. Renewing the mounting helps reinstate the compliant interface specified for the assembly. The surrounding bolts, locknuts, cross members, transverse struts and side sections should also be inspected, since looseness or wear in these parts can produce similar symptoms. An appropriate geometry check may be required after substantial rear axle or suspension work.
FAQs
- Is this an original Porsche component?
Yes. Porsche lists 99633138500 as a rubber mounting in its parts catalogue. - Where does the isolator fit?
It appears in rear axle side-section, side-part, bracket and carrier diagrams for applicable 996 and 997 models. - How many are shown in the assembly?
The supplied exploded-diagram data specifies a quantity of six for each applicable assembly. Confirm how many are needed for the particular repair. - Should other components be checked?
Yes. Inspect the adjacent hardware, cross members, struts and mounting areas for corrosion, damage, movement or wear before installation.
Related reference numbers
Related, superseded, cross reference or alternative numbers for comparison.
99633138500
The product you are viewing cross references to these numbers

- Porsche 996 C2 3.4L 1997-08/01
- Porsche 996 C4 3.4L 1997-08/01
- Porsche 996 C2 3.6L 09/01-2005
- Porsche 996 C4 3.6L 09/01-2005
- Porsche 996 C4S 3.6L 09/01-2005
- Porsche 996 TURBO 2000-05
- Porsche 996 GT2 2001-05
- Porsche 996 GT3 MKI 1999-02
- Porsche 996 GT3 MKII 2003>>
- Porsche 996 GT3 RS 2003-04
- Porsche 997 MK1 Carrera 2 3.6L 2005-08
- Porsche 997 MK1 Carrera 2S 3.8L 2005-08
- Porsche 997 MK1 Carrera 4 3.6L 2005-08
- Porsche 997 MK1 Carrera 4S 3.8L 2005-08
- Porsche 997 MK1 TURBO 2007-09
- Porsche 997 MK1 GT3 / GT3 RS 2007-09
- Porsche 997 MK1 GT2 2007-09
- Porsche 997 MKII Carrera C2 3.6L 2009-12
- Porsche 997 MKII Carrera C4 3.6L 2009-12
- Porsche 997 MKII Carrera C2S 3.8L 2009-12
- Porsche 997 MKII Carrera C4S 3.8L 2009-12
- Porsche 997 MKII GT3 / GT3 RS 2010-11
- Porsche 997 MKII Turbo 2010-13
- Porsche 997 MKII GT2 RS 2011-13
Shop Securely
12 Month Warranty
Worldwide Delivery

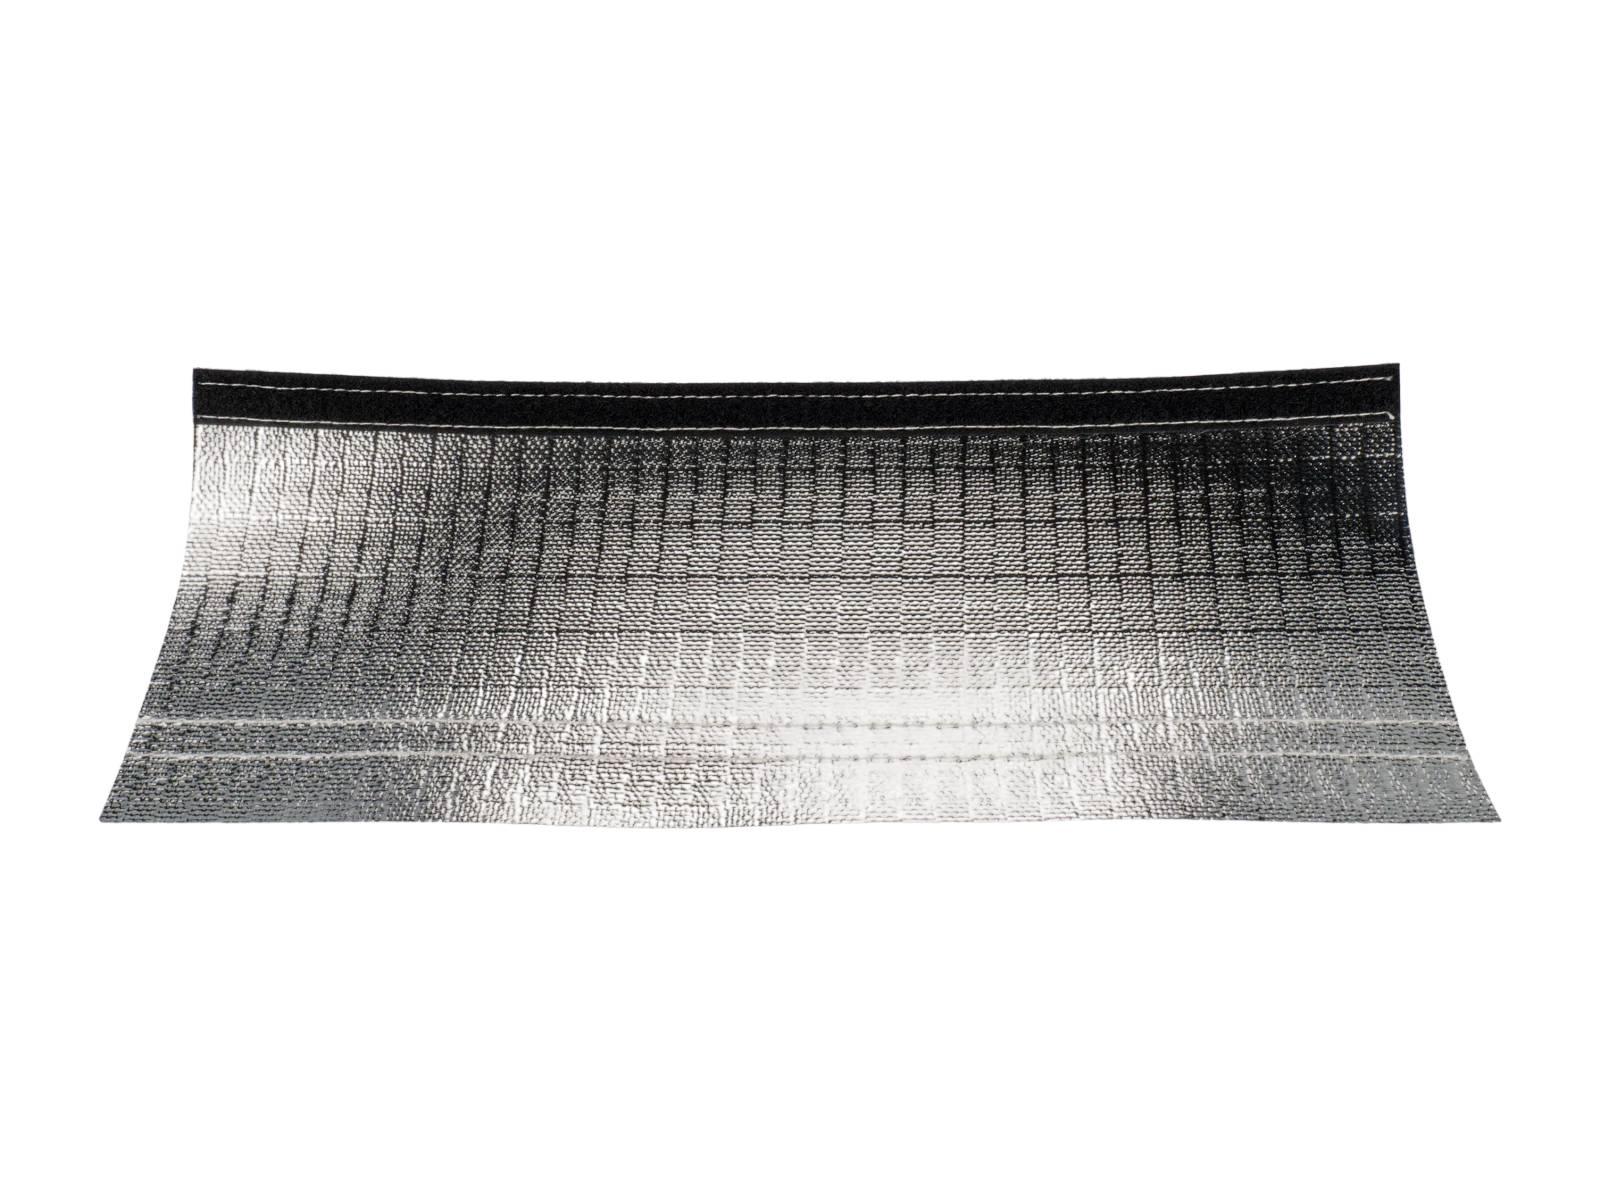
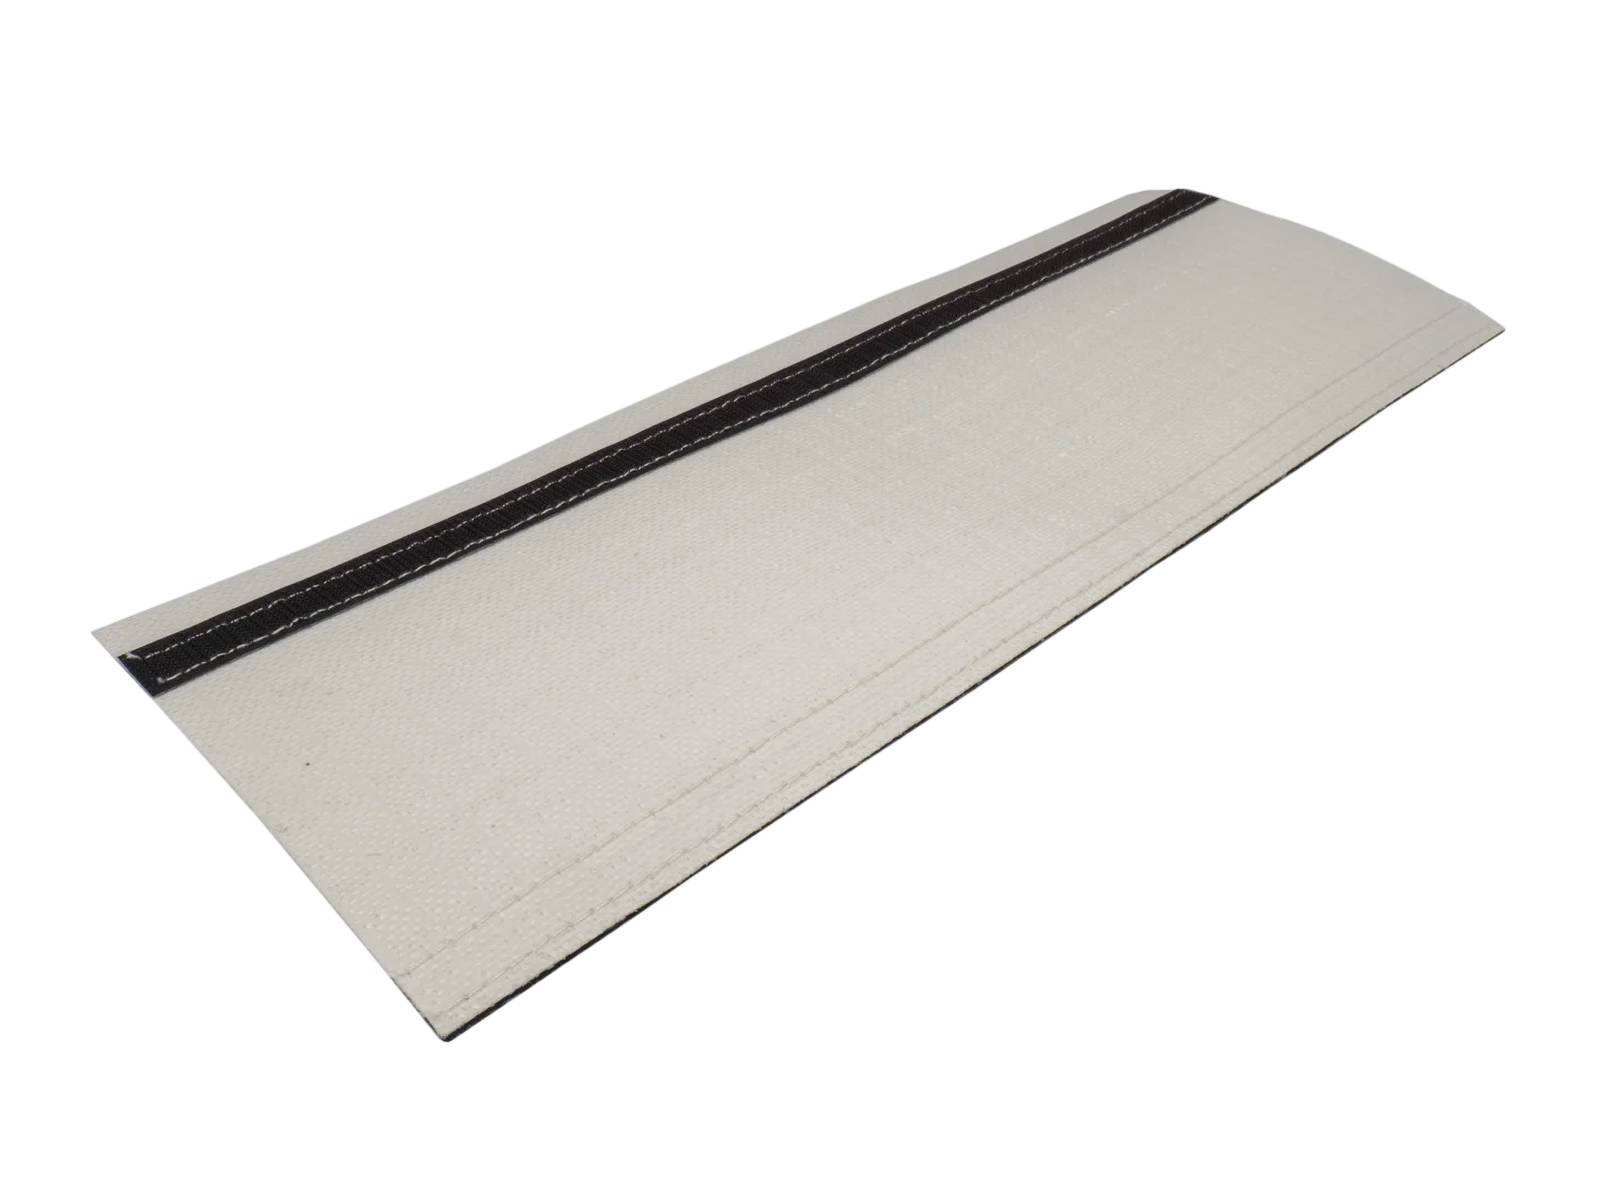
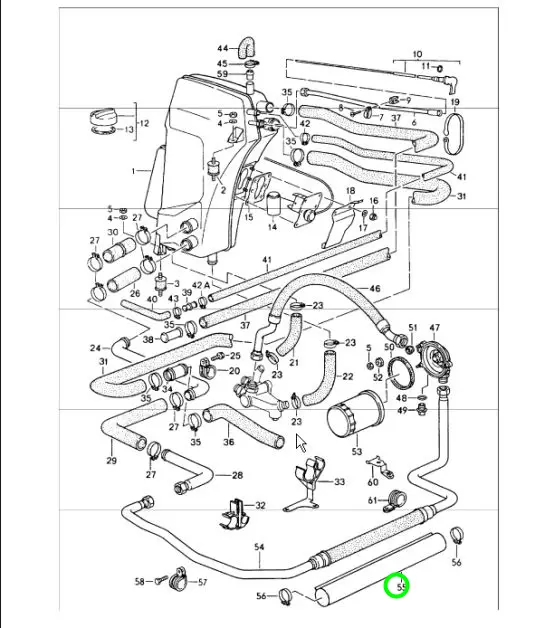
Protective Tube, Oil Filter to Crankcase Oil Pipe.
Fits
- Porsche 964 (911) 1989–1994
- Porsche 964 (911) C2 1989–1993
- Porsche 964 (911) C4 1989–1993
- Porsche 964 (911) RS 3.6L 1991–1993
- Porsche 964 (911) RS 3.8L 1991–1993
- Porsche 964 (911) Turbo 3.3L 1991–1993
- Porsche 964 (911) Turbo 3.6L 1991–1993
Diagram Ref No 55
What This Product Does
This tube provides a protective wrap around the associated oil pipe in the oil tank line assembly. It maintains the intended factory covering and helps isolate the pipe from heat and contact along its installed route.
Functions
- Surrounds the relevant oil pipe within the external tank circuit
- Provides heat shielding for the oil filter console pipe
- Helps limit direct contact and abrasion around the pipe
- Maintains the original routing and assembly arrangement
Technical Details
- Genuine Porsche component
- Part number: 96420735200
- Porsche catalogue designation: protective tube
- Shown at position 55 in the oil tank lines illustration
- Diagram quantity: 1 per vehicle assembly
- Associated with the oil filter console pipe in the Type 964 lubrication system
Symptoms of Fault
- Cracks, splits or heat-related deterioration in the fitted covering
- A protective tube that has moved away from its intended position
- Visible rubbing or unwanted contact around the associated oil pipe
- Damage found while removing or servicing the oil tank pipework
- A missing covering following previous repair work
Why Replacement Matters
Renewing a damaged or absent tube reinstates the pipe protection specified for the original assembly. Replacement is particularly practical when the oil filter console pipe or surrounding tank lines are already accessible. Examine the adjacent clamps, seals and fittings during the work, as the exploded diagram lists these as separate components.
FAQs
- Is this the oil pipe itself?
No. Part 96420735200 is the protective tube fitted around the associated pipe. - Which pipe does it protect?
It is shown with the oil filter console pipework in the Porsche 964 oil tank line assembly. - Are fitting clamps supplied with the tube?
The exploded diagram identifies the relevant clamps separately. Check which supporting parts are required before installation. - How can compatibility be checked?
Compare part number 96420735200 with the removed component and confirm the vehicle details or VIN where necessary.
Related reference numbers
Related, superseded, cross reference or alternative numbers for comparison.
96420735200
The product you are viewing cross references to these numbers
- Porsche 964 (911) C2 1989-93
- Porsche 964 (911) C4 1989-93
- Porsche 964 (911) RS 3.6L 1991-93
- Porsche 964 (911) RS 3.8L 1991-93
- Porsche 964 (911) TURBO 3.3L 1991-93
- Porsche 964 (911) TURBO 3.6L 1991-93
Shop Securely
12 Month Warranty
Worldwide Delivery


Heater Cycling Timing Valve.
The Genuine Porsche Heater Cycling Timing Valve (Part Number: 95965312500) is an original equipment heating system component designed for the Porsche 959, manufactured between 1987 and 1988.
Fits:
Diagram Ref No 17
Developed to Porsche's original specifications, this specialised valve forms part of the vehicle's heating and ventilation system, helping regulate the circulation of heated coolant through the passenger compartment heating circuit.
The cycling valve works within the heater control system to manage coolant flow according to heating requirements, supporting consistent cabin temperature regulation and passenger comfort.
The Porsche 959 features a sophisticated heating and ventilation arrangement, incorporating a dedicated coolant circulation pump, control valves and associated hoses. The heater cycling timing valve helps regulate the flow of heated coolant within this system, allowing cabin heating to be controlled.
Over time, the valve may deteriorate due to ageing, repeated operating cycles, exposure to heated coolant and internal mechanical or electrical faults. A malfunctioning valve can result in inconsistent cabin heating, poor temperature control or unwanted heat when the heating system should be reduced.
Replacing a defective valve with a Genuine Porsche component helps restore the original heating system functionality while preserving the authenticity and engineering integrity of this highly collectible Porsche model.
Ideal for heating system repairs, climate control maintenance and concours-level Porsche 959 restoration projects, this Genuine Porsche Heater Cycling Timing Valve provides a replacement for the original component.
What This Product Does:
The heater cycling timing valve is a control component within the Porsche 959's passenger compartment heating system.
Its primary function is to regulate the passage of heated coolant through the heating circuit, helping control the amount of heat available to the cabin heater.
Working alongside the heater circulation pump, associated coolant hoses and heating controls, the cycling valve helps manage coolant movement according to the demands of the passenger compartment heating system.
Rather than operating solely as a manually positioned valve, the cycling arrangement regulates heating through controlled valve operation.
Its main functions include:
- Regulating heater coolant flow: Helps control the circulation of heated coolant through the passenger compartment heating circuit.
- Supporting cabin temperature control: Allows the heating system to adjust heat delivery according to passenger compartment requirements.
- Controlling heating cycles: Provides controlled valve operation as part of the heating system's temperature regulation process.
- Maintaining heating consistency: Helps prevent excessive or insufficient heat delivery during normal operation.
- Supporting heater circulation: Works alongside the dedicated coolant pump and associated heating system components.
- Improving passenger comfort: Contributes to dependable cabin heating in varying external temperatures.
- Maintaining original heating functionality: Preserves the intended operation of the Porsche 959 heating and ventilation system.
Symptoms Of Wear Or Failure:
The heater cycling timing valve operates within a demanding environment, exposed to coolant temperatures, repeated operating cycles and ageing electrical and mechanical components.
Over time, internal deterioration, contamination, electrical faults or damage to the valve mechanism may interfere with correct operation.
Common symptoms of a worn or faulty heater cycling timing valve include:
- Insufficient cabin heating: A valve that fails to open correctly may restrict heated coolant circulation, resulting in weak or ineffective heating.
- Constant hot air: A valve stuck in an open position may allow unwanted heating even when a lower cabin temperature is selected.
- Inconsistent cabin temperature: Irregular valve operation may cause fluctuations in heater output.
- Intermittent heater operation: Electrical faults or a sticking mechanism may cause the heating system to work unpredictably.
- Slow cabin warm-up: Restricted coolant circulation may increase the time required for the passenger compartment to reach the desired temperature.
- Heater not responding to controls: A faulty valve may prevent the heating system from responding correctly to temperature adjustments.
- Coolant leakage: Deteriorated seals, connections or valve housing damage may allow coolant to escape.
- Visible corrosion or contamination: Ageing and coolant deterioration may cause deposits or corrosion around the valve and its connections.
- Electrical connection faults: Damaged wiring, corroded terminals or poor connections may interfere with valve operation.
- Valve sticking or seizure: Internal deposits or mechanical deterioration may prevent the valve from cycling correctly.
Why Replacement Matters:
Replacing a defective heater cycling timing valve is important for maintaining reliable passenger compartment heating and preserving the original functionality of the Porsche 959's climate control system.
A malfunctioning valve may prevent the heating circuit from regulating coolant flow correctly, resulting in inconsistent heating, excessive cabin temperatures or insufficient warmth during cold conditions.
If the valve develops a coolant leak, continued operation may also lead to coolant loss and contamination of surrounding components.
Installing a Genuine Porsche replacement Heater Cycling Timing Valve helps to:
- Restore accurate heating control: Reinstate the intended regulation of heated coolant within the cabin heating circuit.
- Improve cabin comfort: Help maintain consistent and predictable passenger compartment temperatures.
- Resolve unwanted heating: Address excessive heat caused by a valve that remains open.
- Restore effective cabin heating: Correct restricted coolant flow caused by a confirmed defective valve.
- Maintain heating system reliability: Replace ageing or malfunctioning valve components.
- Prevent coolant leakage: Restore secure coolant containment where the valve itself is leaking.
- Support correct heater circulation: Maintain effective operation alongside the heater pump and associated components.
- Protect surrounding components: Reduce the risk of damage from coolant leaks or deterioration.
- Preserve original Porsche engineering: Maintain the intended heating system configuration using a Genuine Porsche component.
- Support classic vehicle restoration: Restore the heating and ventilation system while retaining the vehicle's original specification.
- Maintain vehicle authenticity: Use the correct Porsche reference for a rare and historically significant model.
Replacing the valve is particularly recommended when investigation confirms incorrect valve cycling, mechanical seizure, internal failure or leakage.
For Porsche 959 vehicles undergoing extensive restoration, inspecting the heater circulation pump, coolant hoses, electrical connections and associated heating controls is also advisable.
Related reference numbers
Related, superseded, cross reference or alternative numbers for comparison.
95965312500
The product you are viewing cross references to these numbers
- We are unable to provide fitting details for this product at this time. Please contact us for further information.
Shop Securely
12 Month Warranty
Worldwide Delivery

The Genuine Porsche Heater Control Valve (Part Number 94457208502) is an essential heating system component designed to regulate the flow of hot engine coolant through the heater circuit on selected Porsche 924S and early Porsche 944 models.
Fits:
- Porsche 924S 2.5L 1986-87
- Porsche 924S 2.5L 1988
- Porsche 944 2.5L 8V 1982-85
Diagram Ref No 35
Manufactured to Porsche's original equipment specifications, this heater control valve helps maintain effective cabin temperature regulation by controlling the supply of heated coolant to the vehicle's heater matrix.
The heating system uses heat generated by the engine to warm the passenger compartment. As engine coolant circulates through the cooling system, a portion can be directed through the heater matrix, where heat is transferred to the air entering the cabin.
The heater control valve regulates this coolant flow, allowing the heating system to provide the required level of cabin warmth while helping prevent unwanted heating when a lower temperature is selected.
Over time, the original valve can deteriorate due to ageing, repeated heating and cooling cycles, coolant contamination and mechanical wear. Internal components may become stiff, seized or unable to close correctly, while the valve housing and hose connections may develop cracks or leaks.
A faulty heater control valve can cause insufficient cabin heating, excessive heat inside the vehicle, inconsistent temperature control or loss of engine coolant.
Replacing a worn or damaged heater control valve with a Genuine Porsche component helps restore the intended operation of the heating system, maintain coolant circuit integrity and provide reliable cabin temperature control.
Ideal for Porsche 924S and 944 maintenance, heater system refurbishment, coolant leak repairs and classic Porsche restoration projects.
What This Product Does:
The heater control valve is a mechanical coolant flow regulation component within the vehicle's heating system.
Its primary functions include:
- Regulates Hot Coolant Flow: Controls the flow of heated engine coolant through the heater matrix.
- Controls Cabin Heating: Helps regulate how much heat is available to warm the passenger compartment.
- Prevents Unwanted Heating: Restricts hot coolant flow when cabin heating is reduced or switched off.
- Supports Effective Heater Operation: Allows coolant to pass through the heater circuit when heating is required.
- Maintains Temperature Control: Works with the vehicle's heater control mechanism to provide more predictable cabin temperature adjustment.
- Supports Windscreen Demisting: Helps provide warm air for demisting and defrosting the windscreen when required.
- Maintains Coolant Circuit Integrity: Provides sealed connections within the heater coolant circuit.
- Supports Passenger Comfort: Helps maintain suitable cabin temperatures during cold weather.
- Maintains Original Equipment Functionality: Restores the factory-specified heater valve arrangement.
- Supports Heating System Reliability: Helps maintain correct coolant flow without unnecessary leakage or restriction.
Symptoms Of Wear Or Failure:
Heater control valves operate in an environment exposed to hot engine coolant, repeated temperature changes and continuous mechanical operation.
Over time, internal seals, moving components and external hose connections can deteriorate.
Common symptoms of a worn or failing heater control valve include:
- No Cabin Heating: A valve stuck in the closed position may prevent sufficient hot coolant from reaching the heater matrix.
- Heater Permanently Blowing Hot Air: A valve stuck open may allow unwanted heat into the passenger compartment even when a cooler temperature is selected.
- Inconsistent Cabin Temperature: A partially seized or incorrectly operating valve may cause unpredictable heating.
- Difficulty Adjusting Heater Temperature: The heater may respond slowly or fail to react correctly to temperature control adjustments.
- Coolant Leakage: Engine coolant may seep or drip from the valve housing, hose connections or sealing areas.
- Low Coolant Level: Continued leakage may require frequent coolant top-ups.
- Cracked or Damaged Valve Housing: Ageing plastic components may become brittle and develop cracks.
- Stiff or Seized Valve Mechanism: Internal corrosion or deposits may prevent the valve from opening or closing smoothly.
- Damaged Operating Linkage: Worn or disconnected control components may prevent the valve from responding to heater adjustments.
- Dried Coolant Deposits: White, pink or coloured residue around the valve may indicate previous leakage.
- Sweet Coolant Smell: Escaping antifreeze may produce a noticeable smell around the engine compartment.
- Reduced Windscreen Demisting Performance: Insufficient hot coolant flow can reduce the heating system's ability to deliver warm air to the windscreen.
- Visible Corrosion or Deterioration: Coolant contamination and age may affect the valve mechanism or its connecting components.
- Coolant Loss and Engine Temperature Problems: Significant leakage may reduce the coolant level and contribute to engine overheating.
Why Replacement Matters:
Replacing a worn, leaking or seized heater control valve is important for maintaining effective cabin heating, reliable temperature adjustment and cooling system integrity.
Key Benefits of Replacement:
- Restores Cabin Temperature Control: Helps maintain the correct flow of hot coolant through the heater circuit.
- Improves Heating Performance: Restores coolant flow where a defective valve is restricting heater operation.
- Prevents Unwanted Cabin Heat: Replaces valves that no longer close correctly.
- Reduces Coolant Leakage: Restores sealing integrity where the original valve housing or connections have failed.
- Supports Windscreen Demisting: Helps maintain the heating performance required to clear mist and condensation.
- Maintains Cooling System Integrity: Helps prevent coolant loss from the heater circuit.
- Reduces Overheating Risk: Repairing a leaking valve helps avoid coolant loss that could affect engine temperature regulation.
- Improves Passenger Comfort: Supports consistent and predictable heating during everyday driving.
- Protects Associated Components: Helps reduce the risk of coolant leakage affecting surrounding engine compartment components.
- Genuine Porsche Quality: Manufactured to original equipment specifications for the applicable heating system.
- Correct Factory Fitment: Designed to match the original valve connections and mounting arrangement.
- Supports Long-Term Reliability: Helps maintain dependable heating and coolant system operation.
- Ideal During Heater System Repairs: Suitable when replacing ageing hoses, repairing coolant leaks or refurbishing the heating system.
- Suitable for Classic Porsche Restoration: Maintains the original heating system configuration of the Porsche 924S and early 944.
Although the heater control valve is a relatively small component, it performs an important role in regulating cabin temperature.
A valve that fails in the closed position can leave the vehicle without effective heating, making cold-weather driving uncomfortable and reducing windscreen demisting performance.
A valve stuck open can allow unwanted heat into the cabin, particularly during warmer weather.
More importantly, a cracked or leaking heater control valve can allow engine coolant to escape. Continued coolant loss may compromise the cooling system and, if left unresolved, contribute to engine overheating.
Replacing the defective valve with a Genuine Porsche component helps restore the factory heating arrangement while maintaining reliable coolant flow and temperature control.
Related reference numbers
Related, superseded, cross reference or alternative numbers for comparison.
94457208502
The product you are viewing cross references to these numbers
- Porsche 924S 2.5L 1986-87
- Porsche 924S 2.5L 1988
- Porsche 944 2.5L 8V 1982-87
Shop Securely
12 Month Warranty
Worldwide Delivery

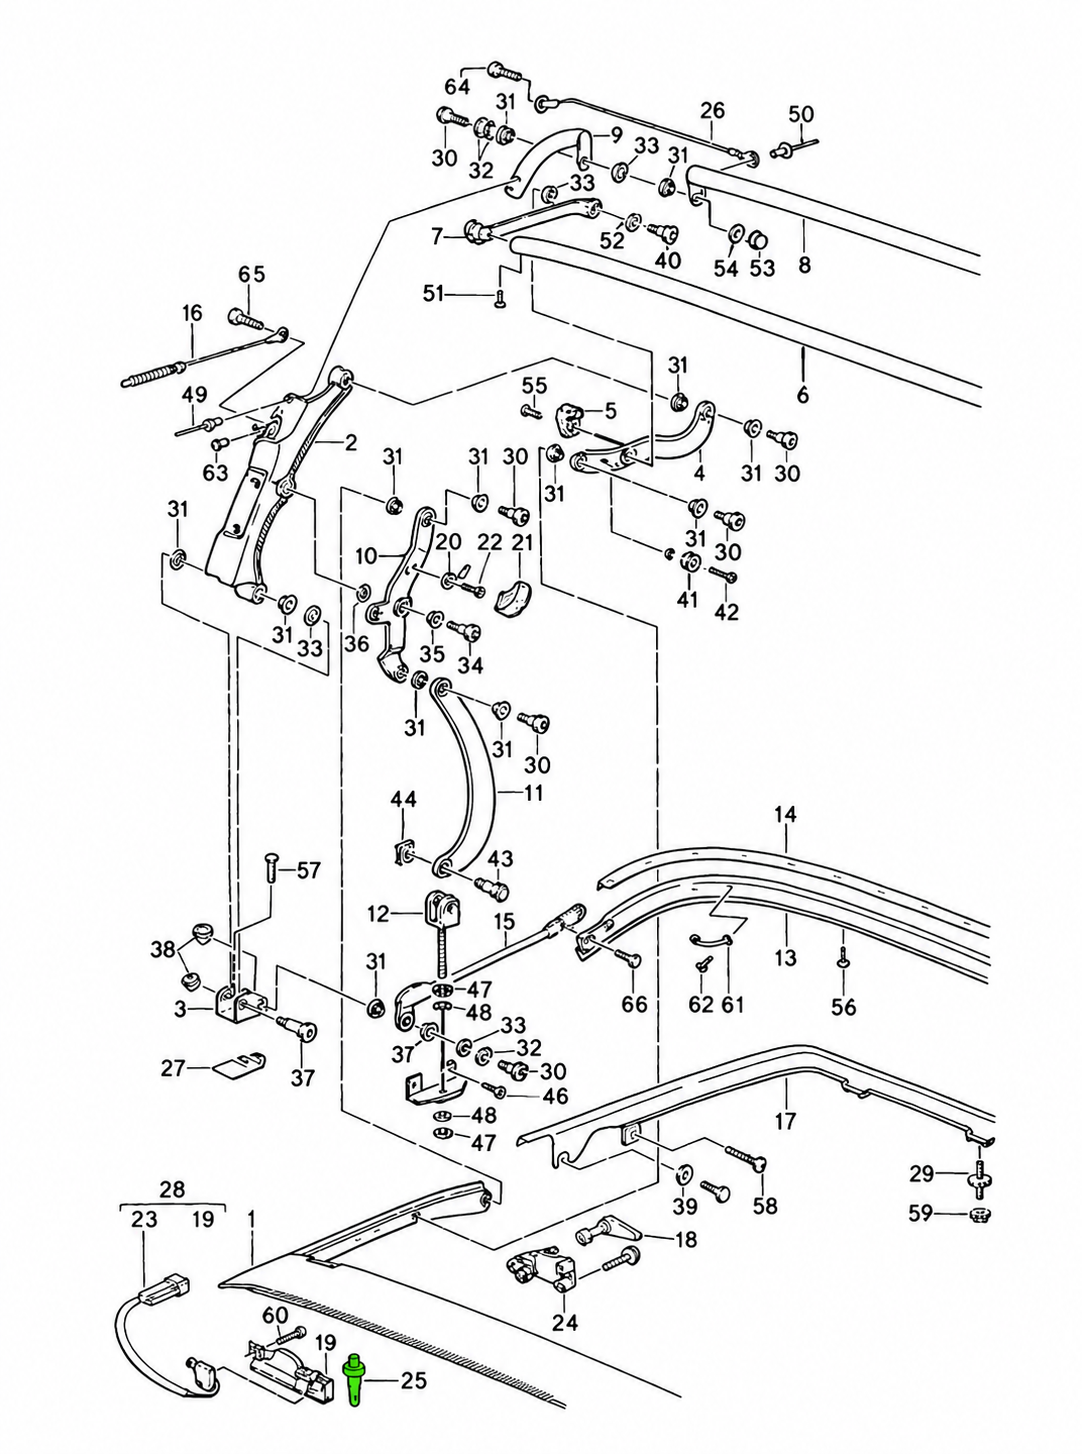
This genuine Porsche locating peg, also known as a locating pin, is used within the convertible top frame.
Fits
- Porsche 968 1992-95 CABRIO
- Porsche 944 1989-91 CABRIO
Check fitment for your specific vehicle (model, year, engine) before ordering.
Diagram: Convertible top frame, ref no 25
What This Product Does
The pin provides a defined locating point in the folding roof-frame mechanism, helping the adjoining frame parts sit in their intended position during roof movement.
Functions
- Locates associated convertible roof-frame parts
- Helps maintain the intended alignment of the folding mechanism
- Replaces a missing, worn or damaged original pin
Technical Details
- Part number: 94156521410
- Component description: Locating peg / locating pin
- Assembly: Convertible top frame
- Body style: Cabriolet
- Quantity shown per assembly: 2
Symptoms of Fault
- Visible scoring, deformation or other damage to the peg
- Unwanted movement at the corresponding roof-frame joint
- Poor alignment between adjacent folding frame components
- Clicking, rattling or irregular movement as the roof operates
- A locating pin missing from the assembly
Why Replacement Matters
Renewing a defective or absent locating peg helps return the connected roof-frame parts to their specified position. Inspect the surrounding pivots, supports, catches and fixings at the same time, as wear elsewhere in the mechanism may also cause looseness or misalignment.
Related reference numbers
Related, superseded, cross reference or alternative numbers for comparison.
94156521410
The product you are viewing cross references to these numbers
- Porsche 944 2.7L 8V 1988-89
- Porsche 944S2 3.0L 16V 1989-91
- Porsche 944 Turbo 2.5L 8V 1989-91
- Porsche 968 3.0L 1992-94
- Porsche 968 Sport 3.0L 1994-95
- Porsche 968 CS 3.0L 1993-95
- Porsche 968 Turbo S 3.0L 1993-94
Shop Securely
12 Month Warranty
Worldwide Delivery

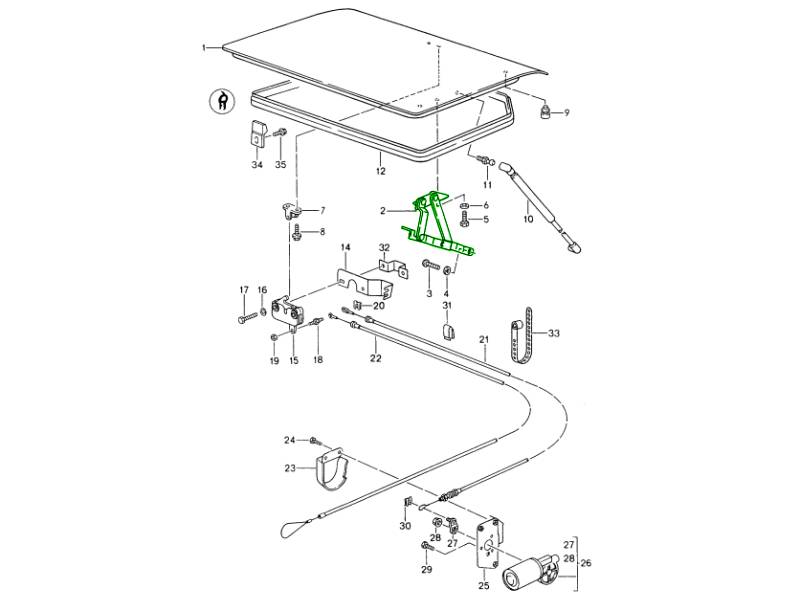
Rear Lid Hinge, is a genuine replacement hinge for the the rear luggage-compartment lid on selected Porsche 944 and 968 Cabriolet models.
Fits:
- Porsche 968 3.0L 1992-94
- Porsche 968 Sport 3.0L 1994-95
- Porsche 968 CS 3.0L 1993-95
- Porsche 968 Turbo S 3.0L 1993-94
Diagram Ref No 2
The hinge provides the pivoting connection between the rear lid and the vehicle body, allowing the lid to open and close smoothly while maintaining correct alignment with the body aperture, latch and surrounding panels.
It is supplied in a prime-coated GRV finish, ready for preparation and painting as required during restoration or body repair.
What This Product Does:
The rear lid hinge supports and guides the rear lid through its opening and closing movement.
Its main functions include:
- Providing a controlled pivot point for the rear lid
- Supporting the right-hand side of the lid
- Maintaining correct rear-lid alignment
- Helping maintain even panel gaps
- Allowing the latch to engage correctly
- Working with the gas-pressure springs that support the lid
- Helping the weather seal compress evenly
- Preventing unnecessary movement or twisting of the lid
The left and right hinges work together to keep the rear lid square and properly positioned throughout its travel.
Symptoms Of Wear Or Failure:
Common signs of rear lid hinge wear or damage include:
- Excessive movement at the hinge
- Lid sitting lower on one side
- Uneven rear-lid gaps
- Rear lid rubbing against surrounding panels
- Difficulty opening or closing the lid
- Lid requiring extra force to latch
- Latch no longer lining up correctly
- Creaking or clicking noises
- Stiff hinge movement
- Visible bending or distortion
- Cracks around the hinge
- Corrosion
- Damaged mounting holes
- Loose hinge mounting hardware
- Paint cracking around the hinge area
- Rear lid twisting as it is opened
Any significant change in lid alignment should prompt inspection of both hinges and their mounting points.
Why Replacement Matters:
A worn or bent hinge can gradually place additional stress on other rear-lid components.
Continued use may contribute to:
- Damage to the opposite hinge
- Excessive load on gas-pressure springs
- Latch wear
- Damaged weather seals
- Chipped paint
- Body-panel contact
- Distortion around mounting points
Replacing the damaged hinge helps restore the original pivot geometry and allows the rear lid to operate correctly.
Related reference numbers
Related, superseded, cross reference or alternative numbers for comparison.
94151213
The product you are viewing cross references to these numbers
- Porsche 968 3.0L 1992-94
- Porsche 968 Sport 3.0L 1994-95
- Porsche 968 CS 3.0L 1993-95
- Porsche 968 Turbo S 3.0L 1993-94
Shop Securely
12 Month Warranty
Worldwide Delivery

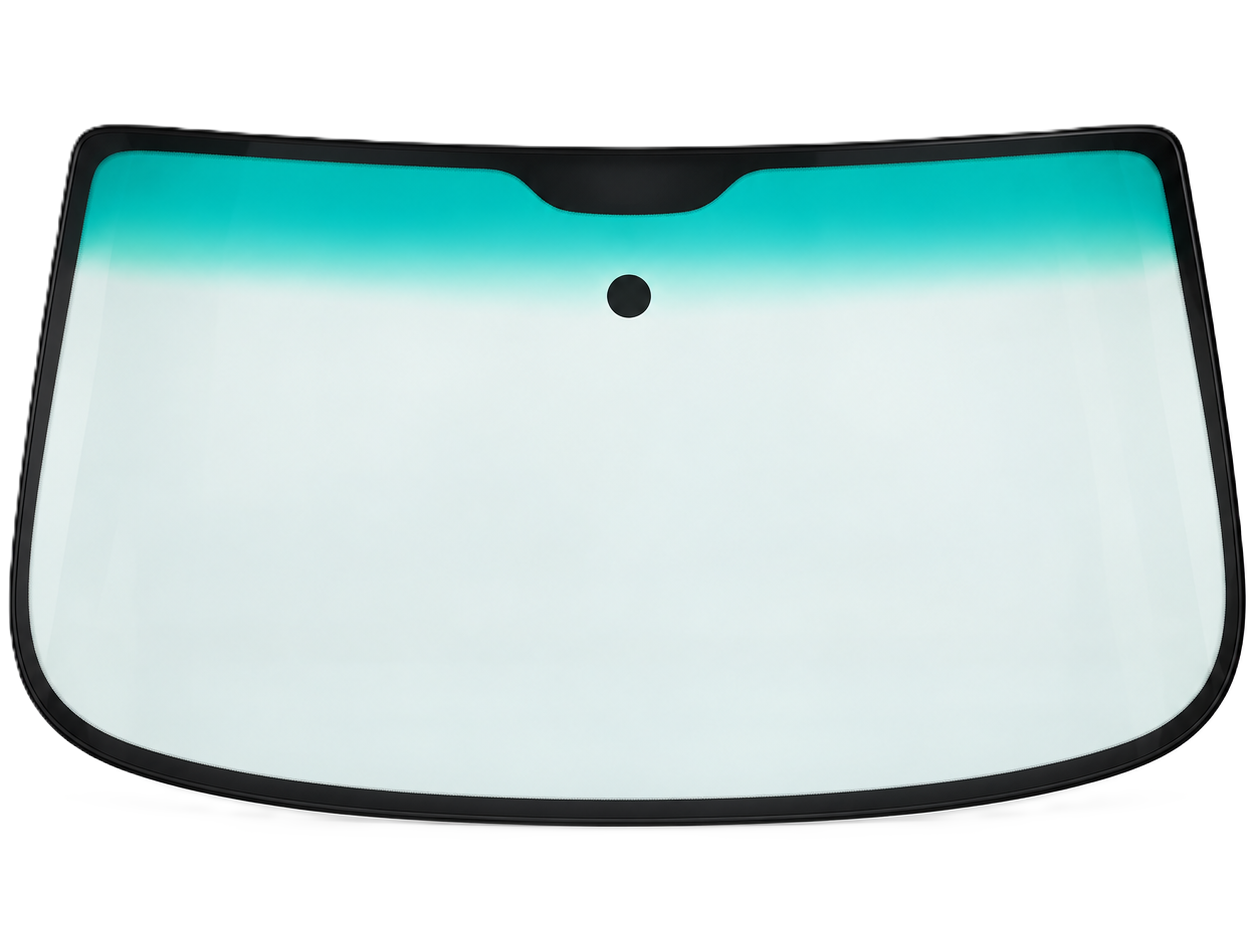
The Porsche Windscreen 98654190119 is a genuine Porsche replacement front windscreen for selected Porsche 986 Boxster models, featuring tinted glass with a darker green shade band across the upper section.
POSTING GLASS & WINDSCREENS
Although we take great care in packaging glass, we cannot offer insurance to cover breakage.
Therefore, we advise customers that they purchase glass by mail order at their own risk.
Packing Surcharge
Wind screens and rear screens can be packed for national delivery and export at a charge this is for the card board box with insert and foam fill.
Fits:
- Porsche Boxster 986 2.7L 2003-04
- Porsche Boxster S 986 3.2L 2003-04
265 - Automatic Anti-Dazzle Interior Mirror With Rain Sensor
440 - Manual Antenna, 4 Loudspeakers MY2002 MY2003 Antenna Diversity
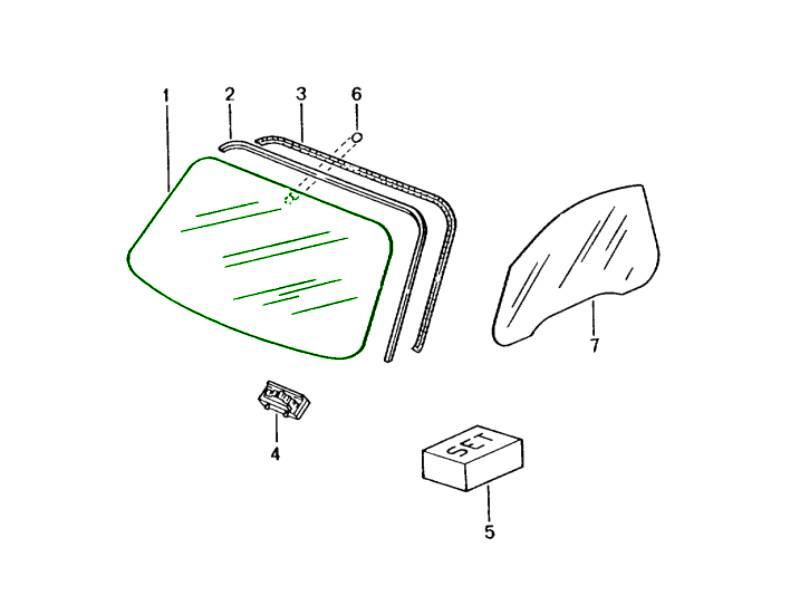
Diagram Ref No 1
Current Porsche dealer catalogues identify this reference as the shaded windscreen for vehicles equipped with a rain sensor, with fitment shown on 2003–2004 Boxster and Boxster S models.
The windscreen provides the correct factory curvature, dimensions and sensor-compatible mounting arrangement required for the applicable vehicle.
What This Product Does:
The windscreen is one of the vehicle's most important visibility and weather-protection components.
Its main functions include:
- Providing clear forward visibility
- Protecting occupants from wind and weather
- Deflecting stones, insects and road debris
- Helping seal the passenger compartment
- Providing the correct mounting surface for the interior mirror
- Accommodating the factory rain-sensor arrangement
- Reducing glare through its tinted glass
- Providing additional sun shading through the darker green upper band
- Maintaining the original exterior appearance of the Porsche 986
The windscreen must provide good optical clarity while remaining securely bonded to the body.
Symptoms Of Wear Or Failure:
Common reasons for windscreen replacement include:
- Cracks
- Large stone chips
- Multiple chips
- Damage in the driver's field of vision
- Cracks spreading from an impact point
- Edge cracks
- Delamination
- Cloudiness between laminated layers
- Optical distortion
- Heavy scratching
- Excessive wiper marks
- Stone pitting
- Damaged rain-sensor mounting area
- Water leakage around the windscreen
- Excessive wind noise
- Damage following accident repair
A windscreen can remain physically intact while becoming sufficiently scratched or pitted to reduce visibility in difficult lighting conditions.
Why Replacement Matters:
A damaged windscreen can compromise visibility and driver comfort.
Replacement may be necessary to restore:
- Clear forward vision
- Rain-sensor compatibility
- Weather sealing
- Correct windscreen fitment
- Reduced wind noise
- Original factory appearance
Cracked or heavily damaged glass should not be ignored because deterioration can continue even after the initial impact.
Related reference numbers
Related, superseded, cross reference or alternative numbers for comparison.
98654190119
The product you are viewing cross references to these numbers
- Porsche Boxster 986 2.7L 2003-04
- Porsche Boxster S 986 3.2L 2003-04
Shop Securely
12 Month Warranty
Worldwide Delivery

Fits:
- Porsche Boxster 986 2.5L 1997-99
- Porsche Boxster 986 2.7L 1999-02
- Porsche Boxster S 986 3.2L 1999-02
- Porsche Boxster 986 2.7L 2003-04
- Porsche Boxster S 986 3.2L 2003-04
Diagram Ref No 8
Also described as a quarter-panel splash shield, the liner sits inside the left rear wheel housing and forms a protective barrier between the rotating tyre and the vehicle body, suspension area and surrounding components.
It helps shield the inner wheel arch from:
- Stones
- Gravel
- Mud
- Water spray
- Road salt
- Dirt and debris
What This Product Does:
The rear wheel housing liner protects areas behind the wheel that would otherwise be directly exposed to debris thrown from the tyre.
Its main functions include:
- Protecting inner bodywork from stone impact
- Reducing mud and water ingress
- Helping protect nearby wiring and fittings
- Reducing dirt accumulation around the wheel housing
- Helping prevent damage to painted metal surfaces
- Reducing wheel-arch noise
- Maintaining the factory wheel-housing layout
- Helping keep surrounding components cleaner
Although it is not a structural suspension component, it provides important protection for the wheel-arch area.
Symptoms Of Wear Or Failure:
Wheel housing liners can deteriorate through impact, age, incorrect removal or tyre contact.
Common symptoms include:
- Cracked plastic
- Split or torn sections
- Missing pieces
- Damaged mounting holes
- Liner hanging down
- Rattling from the rear wheel arch
- Flapping noises at speed
- Scraping or rubbing noises
- Liner contacting the tyre
- Missing clips or fasteners
- Heavy abrasion marks
- Distorted or warped liner sections
- Excessive dirt collecting behind the panel
- Water entering areas normally protected by the liner
A liner can remain partly attached while still being too damaged to provide proper protection.
Why Replacement Matters:
A damaged or missing wheel housing liner exposes the inner wheel arch to increased contamination and impact.
Continued use may contribute to:
- Stone damage
- Paint deterioration
- Increased corrosion risk
- Dirt accumulation
- Damage to nearby wiring or fittings
- Increased wheel-arch noise
- Further damage to adjoining panels
- Loose liner sections contacting the tyre
Replacing the liner restores the protective barrier originally designed into the vehicle.
Related reference numbers
Related, superseded, cross reference or alternative numbers for comparison.
98650457
The product you are viewing cross references to these numbers
- Porsche Boxster 986 2.5L 1997-99
- Porsche Boxster 986 2.7L 1999-02
- Porsche Boxster S 986 3.2L 1999-02
- Porsche Boxster 986 2.7L 2003-04
- Porsche Boxster S 986 3.2L 2003-04
Shop Securely
12 Month Warranty
Worldwide Delivery

Front Bumper Beading, Satin Black
The Front Bumper Beading is a replacement exterior trim component for the Porsche 968, finished in satin black to maintain the original factory-style appearance. Fitted along the front bumper joint, the beading provides a neat finishing edge between adjoining body panels, helping protect the contact area and maintain a consistent appearance.
Fits
- Porsche 968 3.0L 1992–94
- Porsche 968 Sport 3.0L 1994–95
- Porsche 968 CS 3.0L 1993–95
- Porsche 968 Turbo S 3.0L 1993–94
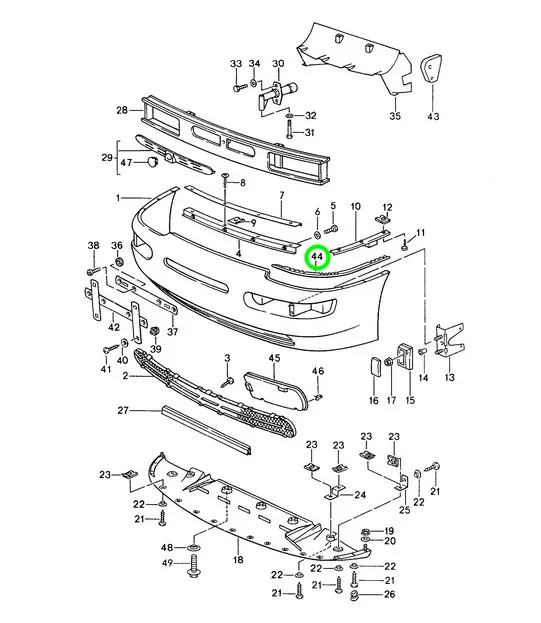
Diagram Ref No 44
What This Product Does
The piping forms the finishing strip along the left-hand joint between the front bumper or apron and the adjacent body panel. It provides the correct factory-style transition and replaces beading that has deteriorated, become distorted or gone missing during body repairs.
Functions
- Finishes the left side of the front bumper joint
- Covers the transition between adjoining bodywork components
- Helps maintain an even, consistent exterior joint
- Restores the original satin-black detailing
Technical Details
- Component: front bumper piping or beading
- Position: front left and right
- Finish: satin black
- Diagram quantity: 1 each side
- Manufacturer: Genuine Porsche
Symptoms of Fault
- Cracking, splitting or deformation of the beading
- Loose or raised trim beside the front bumper
- A visible gap or untidy joint at the left bumper edge
- Surface fading or deterioration through age and exposure
- Missing piping after bumper removal or accident repair
Why Replacement Matters
Replacing worn or absent piping restores the intended finish around the front apron and helps produce a uniform joint with the neighbouring bodywork. A model- and side-specific Genuine Porsche component is suitable where original appearance and factory fitment are priorities.
FAQs
- Where is this piping fitted?
It is intended for the left or right hand side of the front bumper and apron assembly. - What colour and finish is it?
The supplied specification identifies the component as satin black. - Can it be used on the right-hand side?
No. The right-side beading is a separate, side-specific component. - What should be checked while fitting it?
Inspect the nearby retaining strips, rails, fasteners and bumper trim, replacing any damaged or missing fixings as required.
Check fitment for your specific vehicle (model, year, engine) before ordering.
Related reference numbers
Related, superseded, cross reference or alternative numbers for comparison.
94450553
The product you are viewing cross references to these numbers
- Porsche 968 3.0L 1992-94
- Porsche 968 Sport 3.0L 1994-95
- Porsche 968 CS 3.0L 1993-95
- Porsche 968 Turbo S 3.0L 1993-94
Shop Securely
12 Month Warranty
Worldwide Delivery




.jpg)
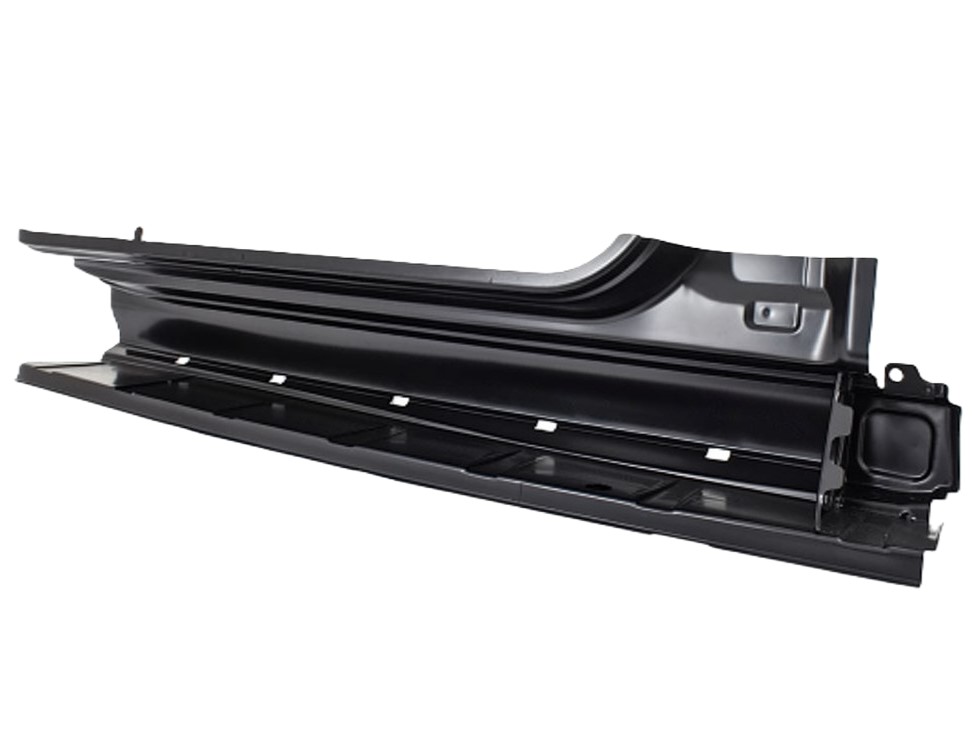
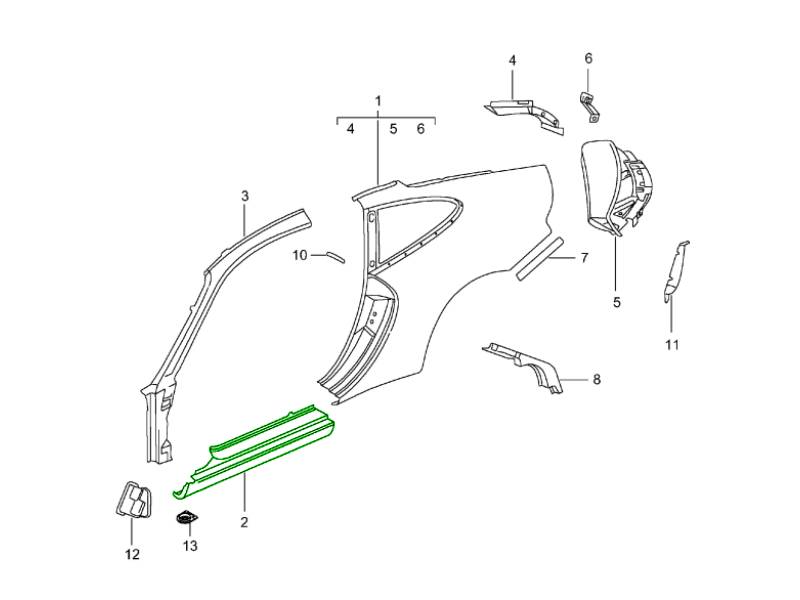
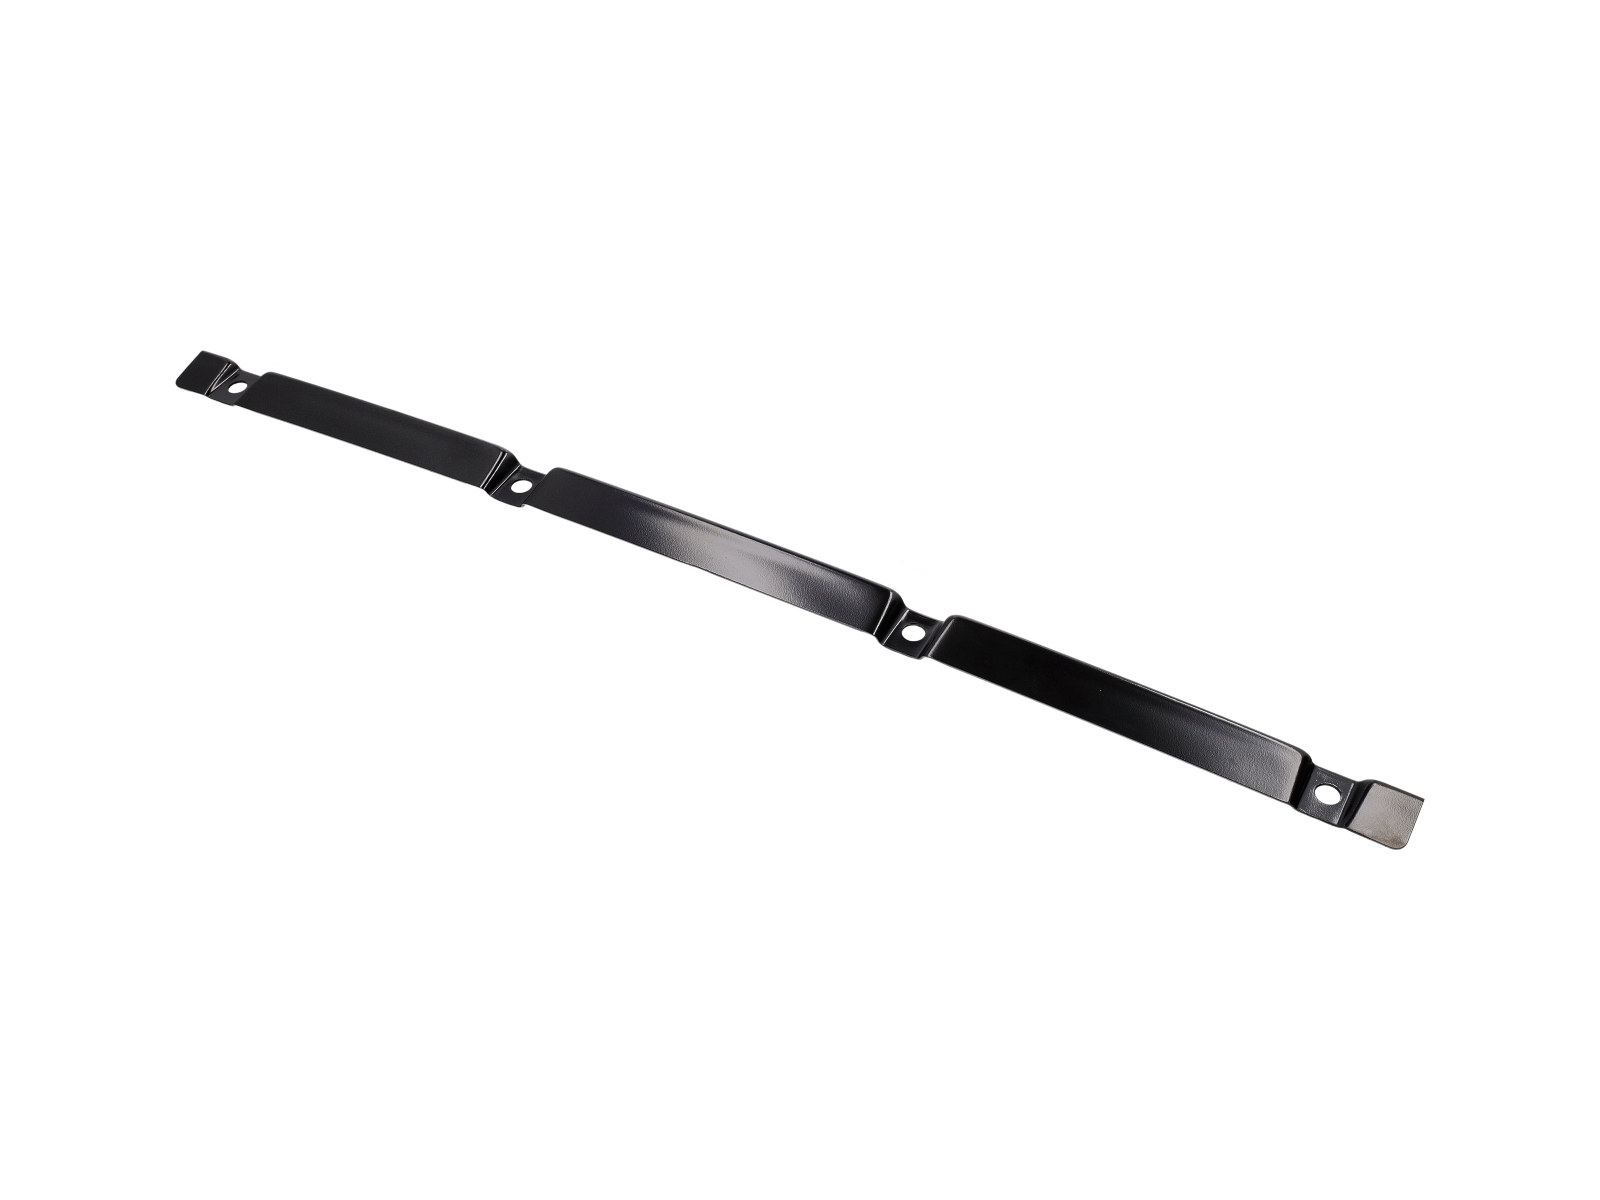
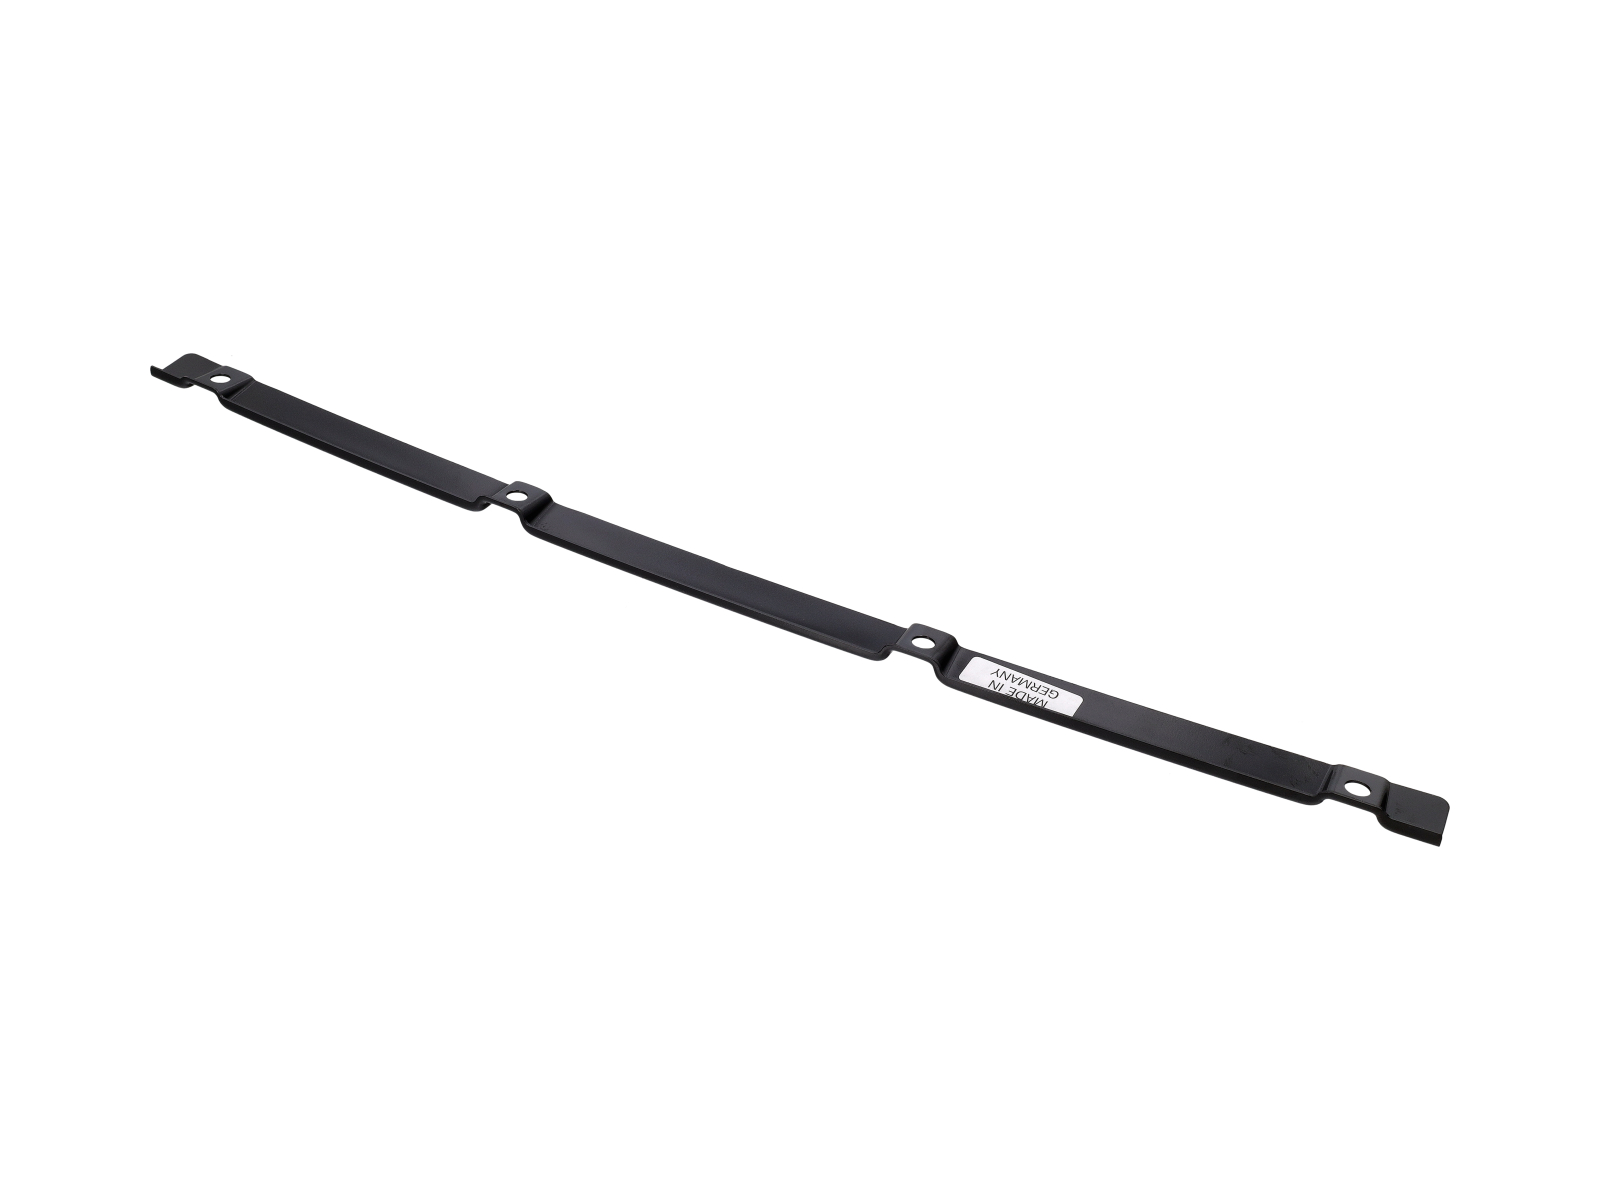
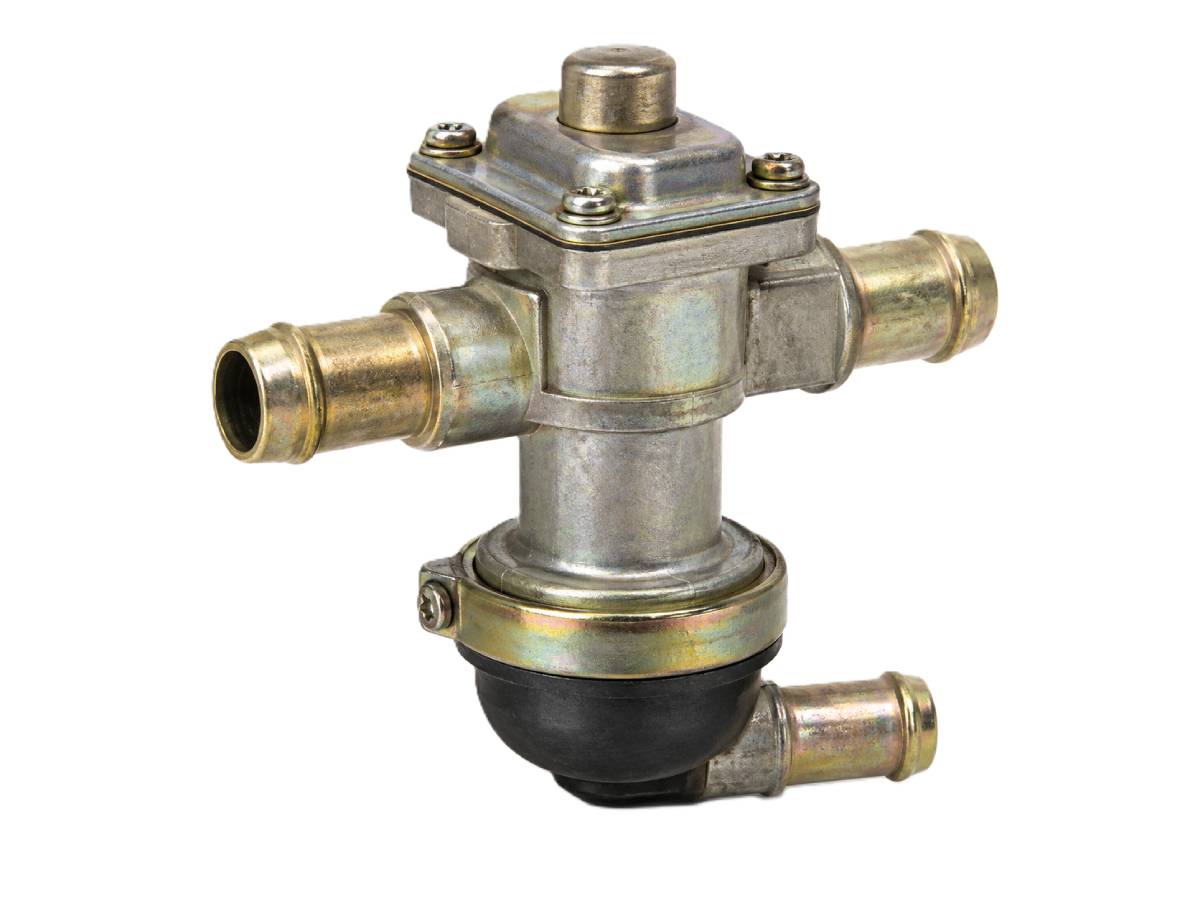
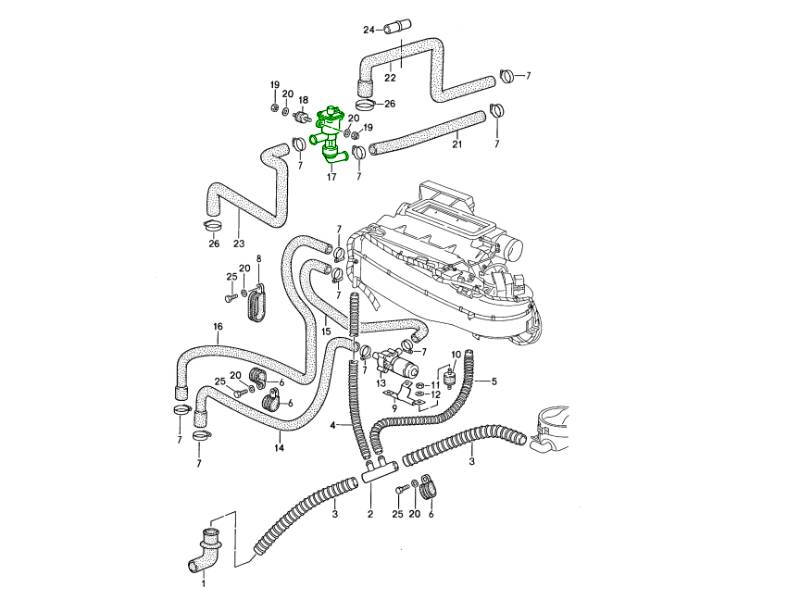
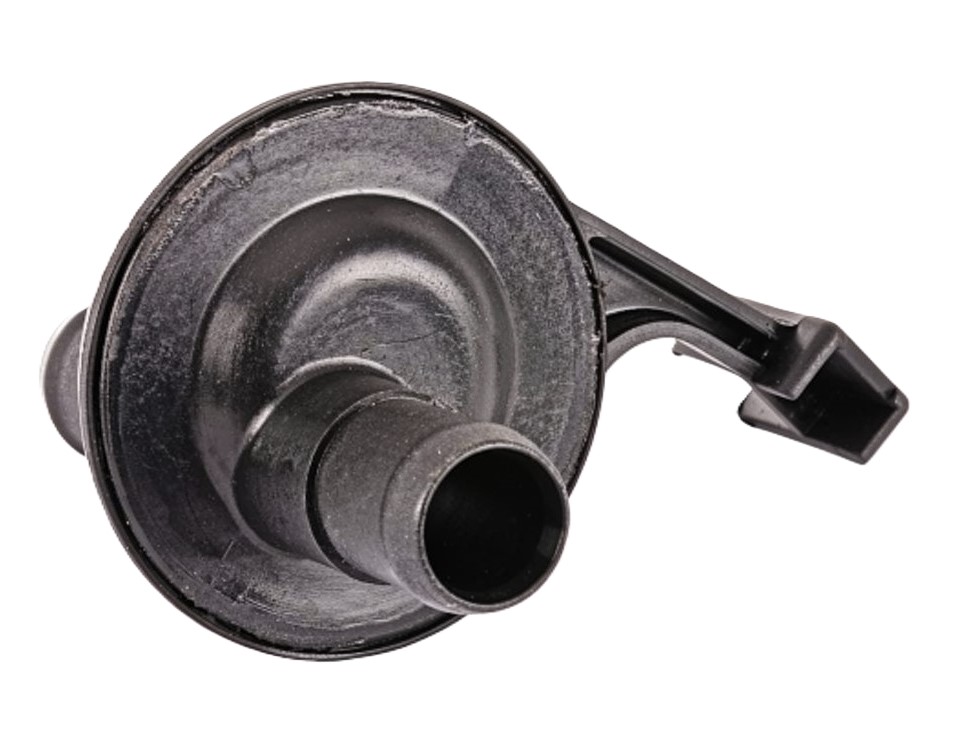
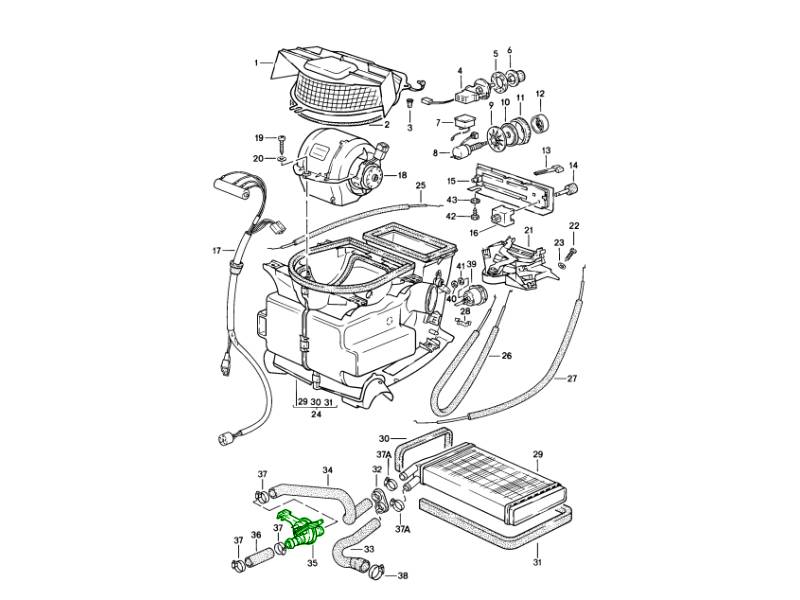


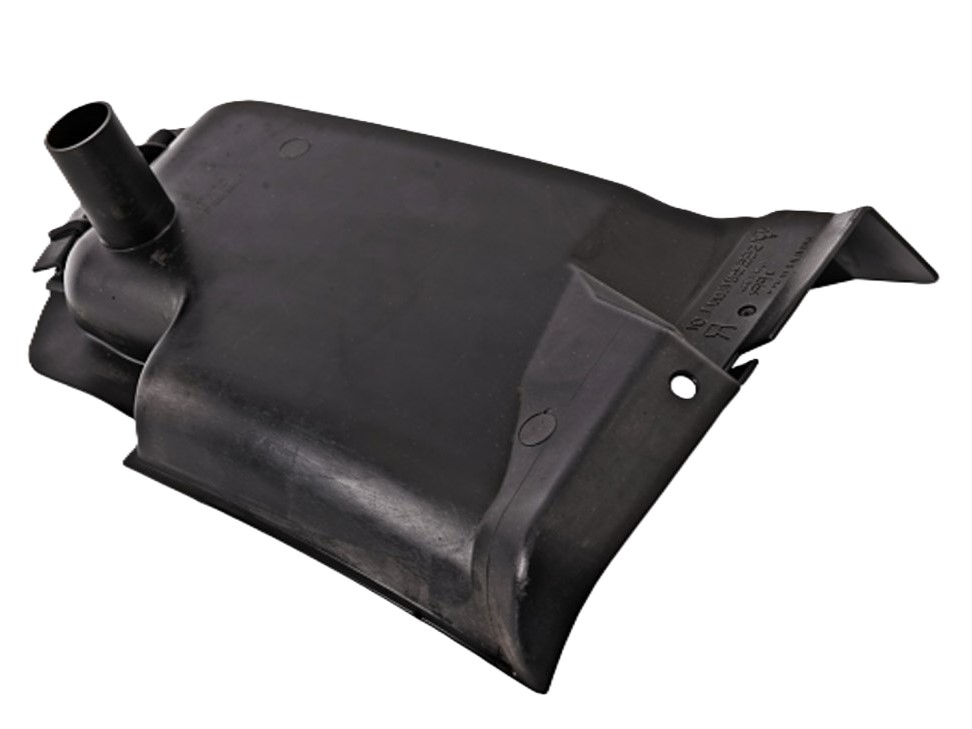
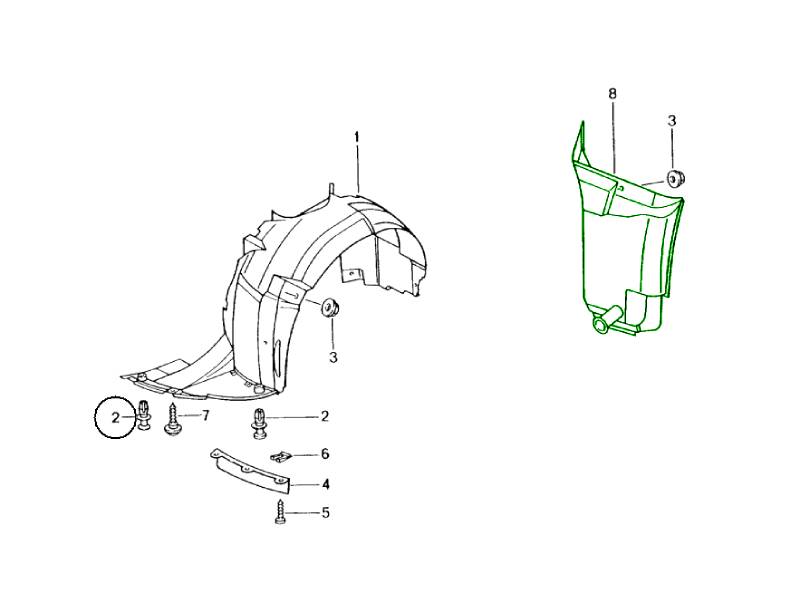
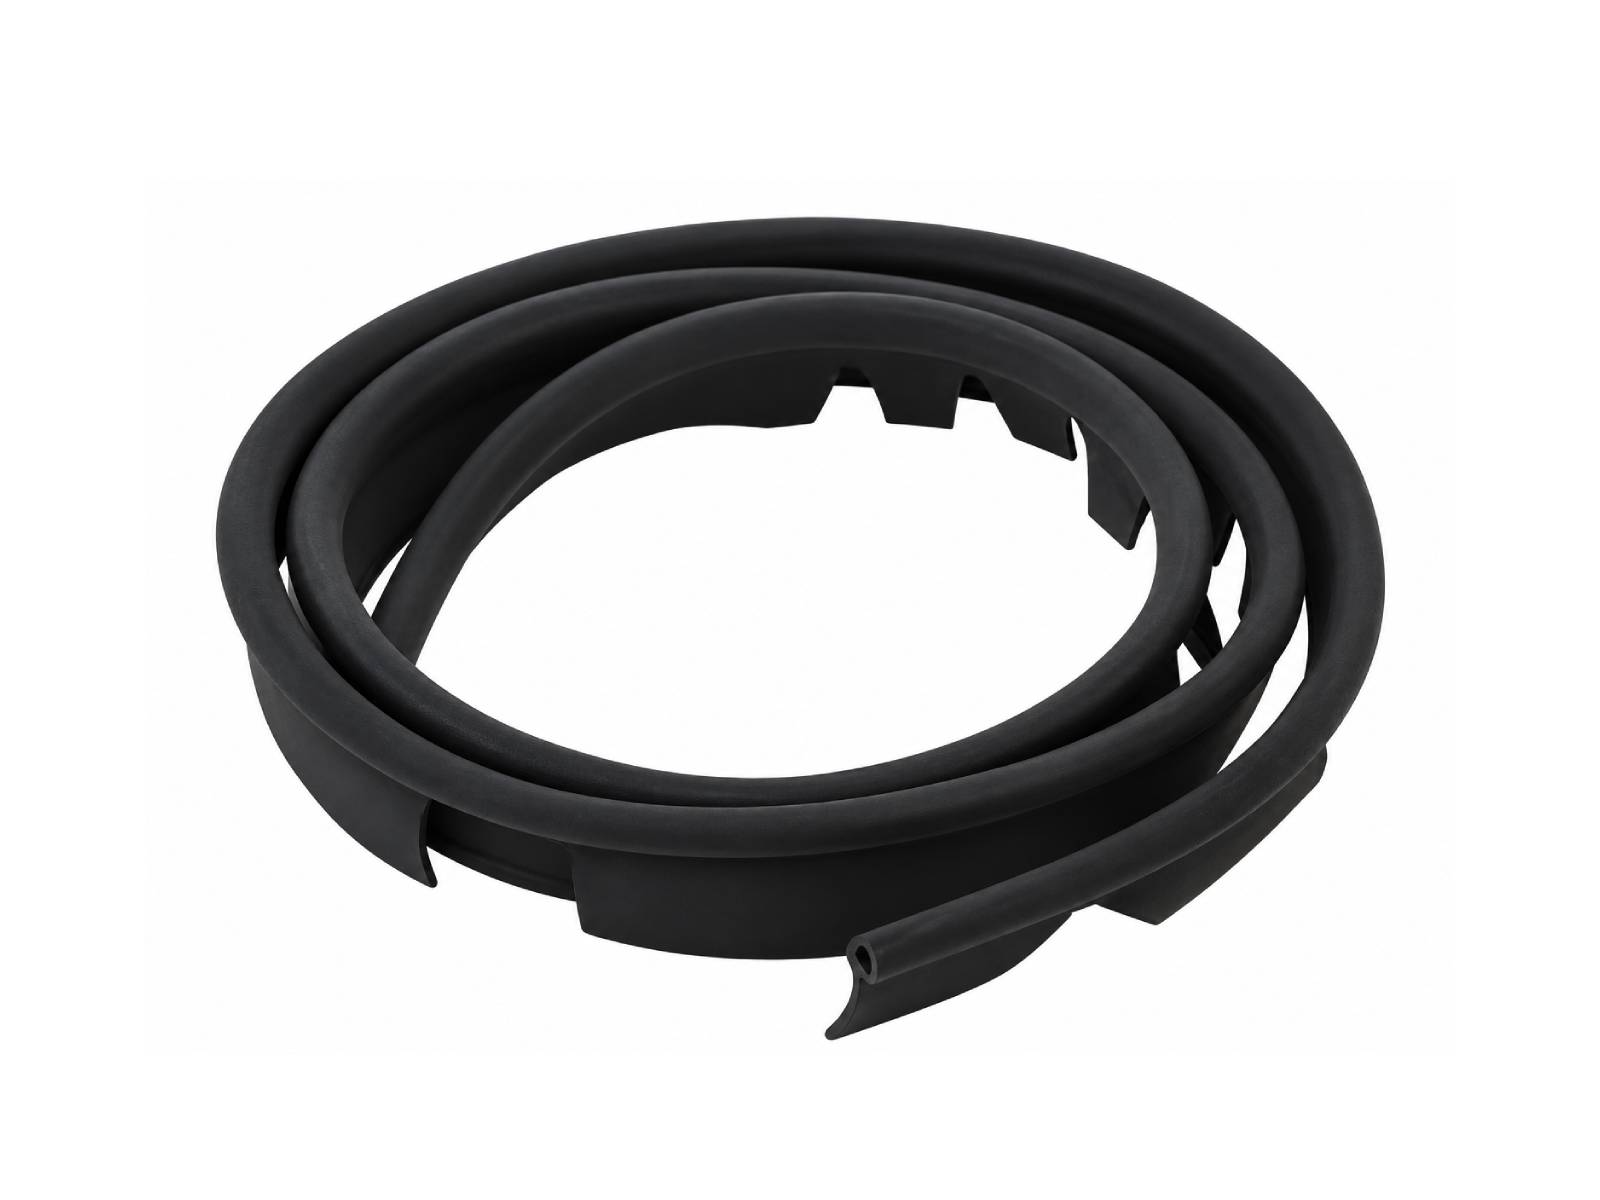
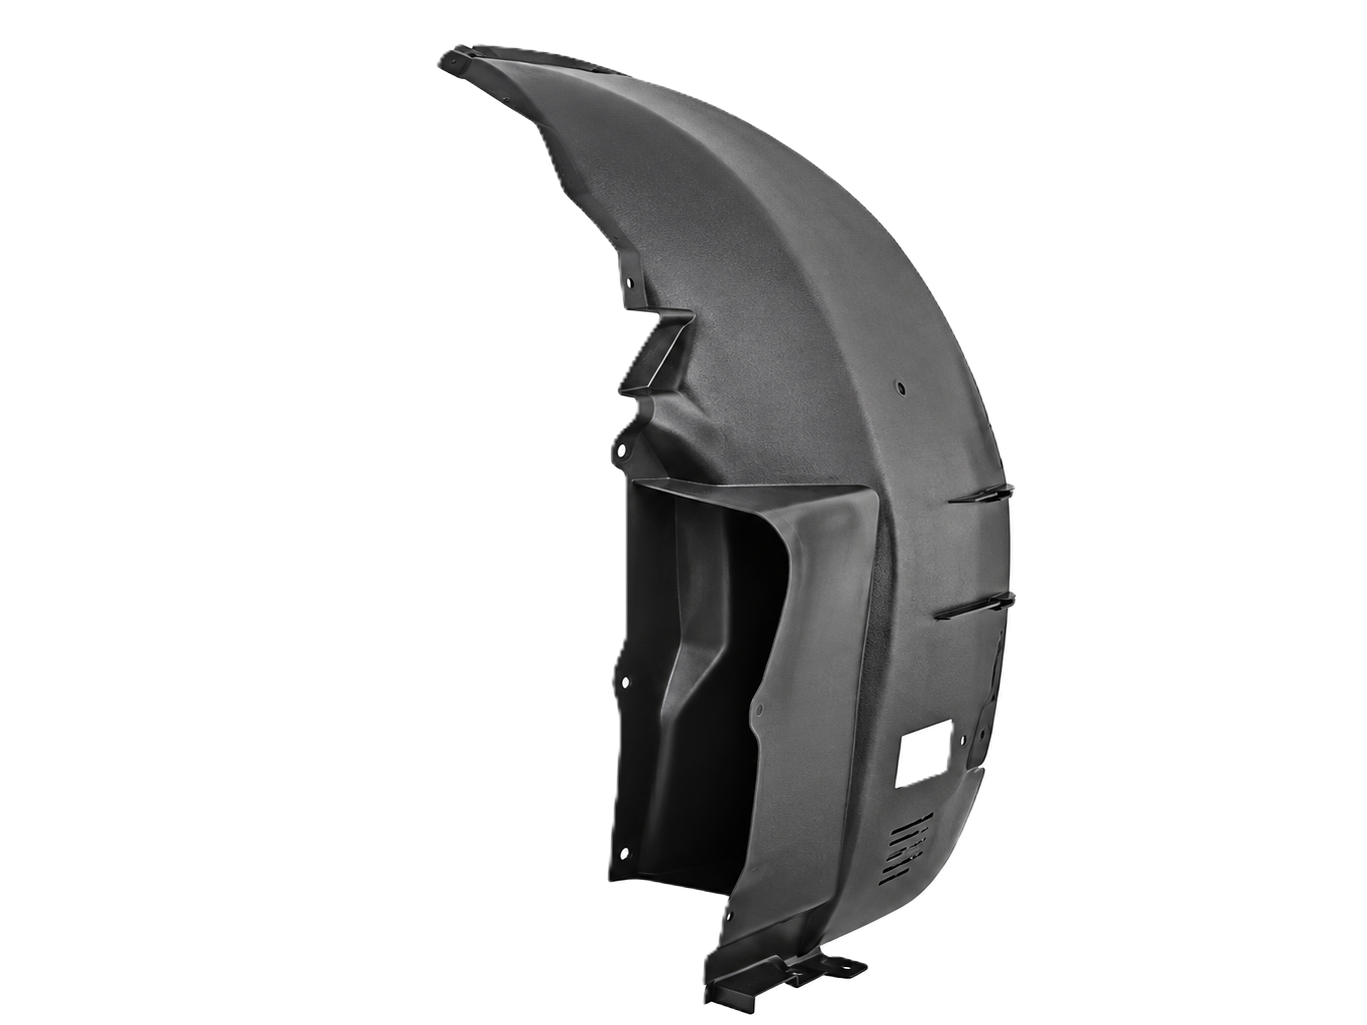
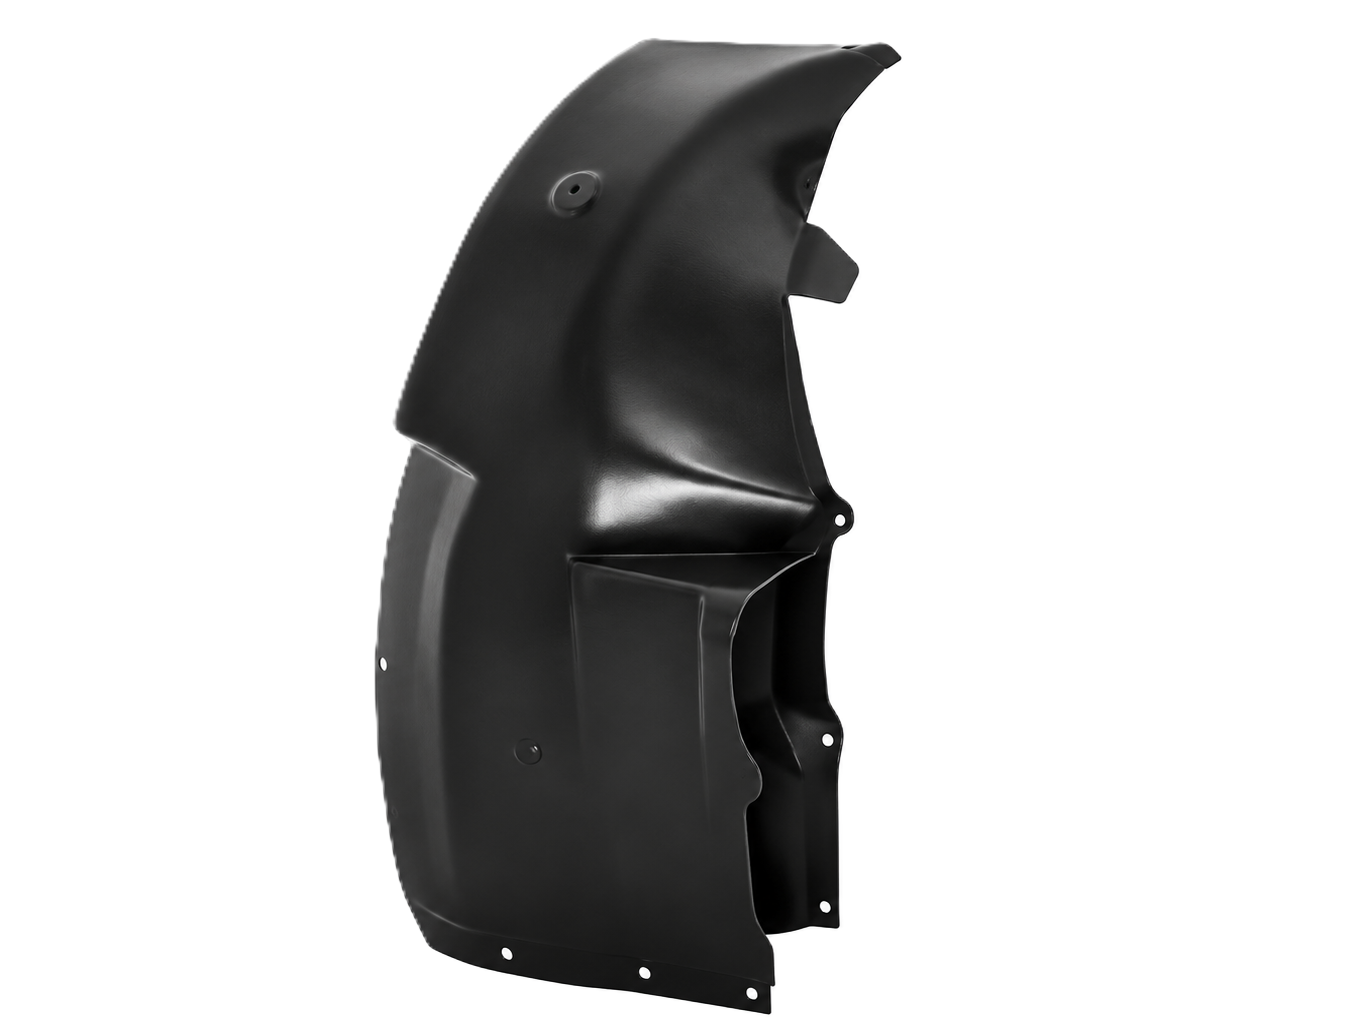
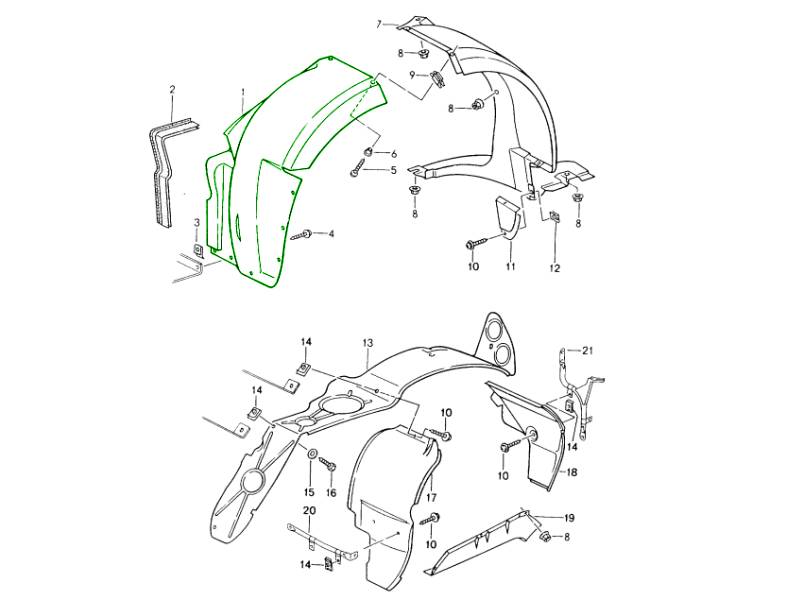
The Genuine Porsche Front Wheel-Housing Liners (Part Numbers: 96450412500 and 96450412600) are original equipment protective panels designed for the front wheel arches of Porsche 911 (964) Carrera 2 and Carrera 4 models.
Fits:
- Porsche 964 (911) C2 1989-93
- Porsche 964 (911) C4 1989-93
Diagram Ref No 1
These position-specific panels form the front sections of the front wheel-housing liner assemblies, providing a protective barrier between the rotating wheels and the surrounding bodywork.
The available versions are:
96450412500 – Front Left-Hand (LH) Wheel-Housing Liner
96450412600 – Front Right-Hand (RH) Wheel-Housing Liner
The wheel arches of a Porsche 911 are continually exposed to water, mud, loose gravel, road salt and other debris thrown upwards by the tyres.
Without adequate protection, these materials can reach vulnerable areas of the inner bodywork, accumulate around mounting points and contribute to deterioration over time.
The wheel-housing liners help limit this exposure by providing a physical barrier between the road wheel and the inner wheel arch.
They also help maintain the intended covering and arrangement of the surrounding underbody and wheel-housing components.
Manufactured to Porsche's original equipment specifications, each liner is shaped to fit its designated installation position within the 964 Carrera front wheel arch.
Correct fitment is important for maintaining suitable clearance around the tyre and ensuring that the panel remains securely attached during driving.
The wheel-housing liners are exposed to constant road contamination, temperature changes, vibration and occasional contact with road debris.
Over time, they may become cracked, distorted, abraded or damaged around their mounting holes.
Broken retaining points or missing fasteners can allow a liner to become loose, potentially causing rubbing noises or contact with the tyre.
A missing or damaged liner may also leave sections of the inner wheel arch more exposed to moisture, dirt and stone impacts.
Replacing a worn or damaged liner with a Genuine Porsche component helps restore the original protective covering, maintain correct wheel-arch fitment and support the long-term preservation of the vehicle's bodywork.
Ideal for Porsche 964 maintenance, accident repairs, bodywork restoration and corrosion prevention, these Genuine Porsche Wheel-Housing Liners provide factory-specified replacements for the appropriate front wheel arch sections.
What This Product Does:
The front wheel-housing liner is a protective panel positioned inside the front wheel arch.
Its primary function is to help shield the inner wheel housing and surrounding components from debris and moisture thrown up by the rotating tyre.
The liner also forms part of the original wheel-arch covering arrangement, working alongside other protective panels, seals and retaining hardware.
Its main functions include:
- Protecting the inner wheel arch: Helps shield bodywork surfaces from stones, mud and road debris.
- Reducing water exposure: Limits direct spray onto sections of the inner wheel housing.
- Helping prevent corrosion: Reduces exposure to road salt and moisture that can contribute to metal deterioration.
- Reducing stone impacts: Provides a protective barrier against debris thrown upwards by the tyre.
- Maintaining wheel-arch coverage: Completes the factory-designed front wheel-housing arrangement.
- Protecting neighbouring components: Helps limit direct exposure of nearby brackets, fasteners and other components to road contamination.
- Maintaining correct wheel clearance: Fits within the original wheel arch without interfering with standard wheel and tyre movement when installed correctly.
- Supporting original bodywork construction: Preserves Porsche's specified protective panel arrangement.
- Reducing unwanted debris accumulation: Helps prevent direct contamination of areas behind the liner.
- Supporting vehicle restoration: Replaces missing or damaged original wheel arch protection.
Symptoms Of Wear Or Failure:
Wheel-housing liners are durable components, but prolonged exposure to road debris, vibration and mechanical impacts may cause deterioration.
Common signs of a worn or damaged liner include:
- Visible cracks: Impact damage or ageing may cause fractures in the panel.
- Broken mounting holes: Damaged attachment points may prevent secure installation.
- Loose wheel-arch liner: Missing or damaged fasteners may allow movement.
- Rubbing noises: An insecure panel may contact the tyre or another moving component.
- Rattling from the wheel arch: Loose sections may vibrate while driving.
- Scratches and abrasion: Repeated contact with debris or the tyre may wear the surface.
- Distorted shape: Impact or incorrect installation may affect the panel's original profile.
- Partially detached liner: The panel may hang away from its intended mounting position.
- Missing liner sections: Severe damage may leave sections of the wheel arch exposed.
- Accumulated mud behind the panel: Incorrect fitment or damaged edges may allow contamination to collect in unwanted areas.
- Damaged retaining hardware: Corroded screws or missing clips may compromise attachment.
- Uneven wheel-arch fitment: The liner may no longer align correctly with neighbouring panels.
- Visible stone damage: Repeated impacts may weaken sections of the panel.
- Tyre contact marks: Incorrect positioning may cause abrasion between the tyre and liner.
- Damage after suspension or bodywork repairs: Previous dismantling may have left the panel incorrectly installed.
Why Replacement Matters:
Replacing a damaged wheel-housing liner helps restore the original protection provided to the inner wheel arch.
A cracked, missing or partially detached liner may leave surrounding bodywork exposed to increased road contamination.
On classic Porsche 964 models, protecting the inner wheel arches is particularly important because trapped moisture, dirt and road salt can contribute to long-term corrosion.
A loose liner may also move during driving and potentially contact the tyre.
Installing a Genuine Porsche replacement Wheel-Housing Liner helps to:
- Restore wheel-arch protection: Replace missing or damaged protective covering.
- Reduce exposure to road debris: Help shield the inner bodywork from stones and loose gravel.
- Limit water and salt contamination: Maintain the protective barrier between the wheel and inner arch.
- Support corrosion prevention: Reduce direct exposure of vulnerable areas to road moisture.
- Maintain correct tyre clearance: Restore the original panel position within the wheel arch.
- Reduce unwanted rattling: Replace a panel that has become loose or distorted.
- Prevent further panel damage: Address broken mounting points before the liner becomes detached.
- Protect surrounding components: Reduce contamination of nearby brackets and fasteners.
- Restore factory fitment: Maintain the original Porsche wheel-housing arrangement.
- Support accident repairs: Replace damaged panels following minor impacts.
- Maintain vehicle originality: Use the appropriate Genuine Porsche replacement.
- Support classic Porsche restoration: Renew deteriorated wheel-arch components.
- Preserve long-term bodywork condition: Maintain the intended protection within the wheel housing.
Replacement is recommended when the liner is cracked, severely abraded, distorted, missing or unable to remain securely mounted.
If the surrounding wheel housing or mounting points are corroded or damaged, those areas should also be repaired.
Related reference numbers
Related, superseded, cross reference or alternative numbers for comparison.
96450412
The product you are viewing cross references to these numbers
- Porsche 964 (911) C2 1989-93
- Porsche 964 (911) C4 1989-93
Shop Securely
12 Month Warranty
Worldwide Delivery


Monday-Friday: 8.30am - 5.30pm (GMT)
Saturday: Closed
Sunday: Closed